- Click the Selection tool in the Tools panel.
- On the Timeline, select the "menu and button" layer.
If the layer is locked, unlock it.
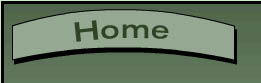
- In the upper-right corner of the Stage, select the Home button.
- In the Actions panel, you'll see the Script Assist button above the ActionScript editor.
Click Script Assist to display Script Assist mode.
With no functions selected, the Script Assist pane is blank.
Initially, the Script Assist portion of the Actions panel is blank. Script Assist mode prompts you to select options and set parameters for the functions that you add to the selected button. The parameters are displayed when you add an ActionScript function.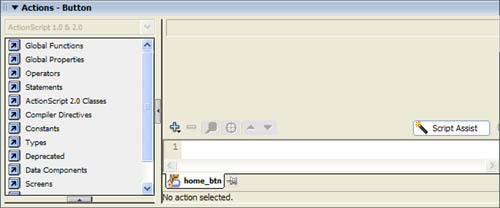
Note: You may notice that when Script Assist mode is enabled, you cannot directly edit code in the ActionScript editor, because it is read-only. All interaction with the code in the editor is through Script Assist mode with one important exception: you can highlight functions in the ActionScript editor and delete them.
- To add a function to the button, click Add on the toolbar.
Clicking the Add button displays all of the predefined ActionScript functions.
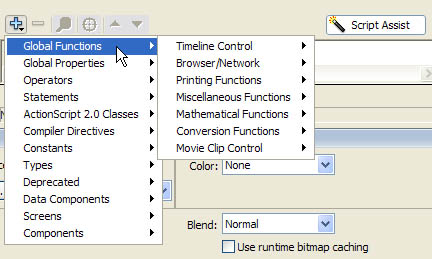
- From the Movie Clip Control option, select the on event handler.
Note: An alternative method of adding ActionScript functions is to browse for and then select them from the Actions toolbox. The Add button on the Actions panel toolbar and the Actions toolbox display the same categories of functions and you can add functions to the editor from both.
Script Assist mode prompts you to set the function's parameters.
The release event of the on event handler is selected by default.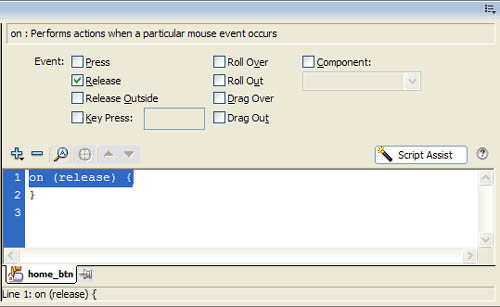
You'll use the release event to trigger the script action when the user clicks Home.
- Click Add again and then select the goto() function from the Global Functions > Timeline Control option.
Adding the function that is triggered when the event occurs
The goto() function is added as the action of the on event handler. In other words, when the Home button is pressed (the on handler) and released (the release event), the goto() action is executed.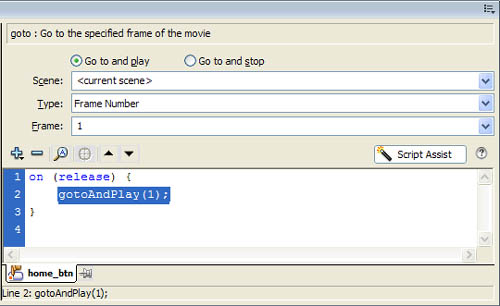
When the Home button is clicked, the movie clip should move to and stop at the Home frame of the Timeline. To do this, you use Script Assist mode to modify the default parameters of the goto() function.
- In the Script Assist panel, select the Go To and Stop option.
- Set the Type to Frame Label by selecting it from the Type pop-up menu.
- In the Frame text box, enter home.
Modifying function parameters to complete the script
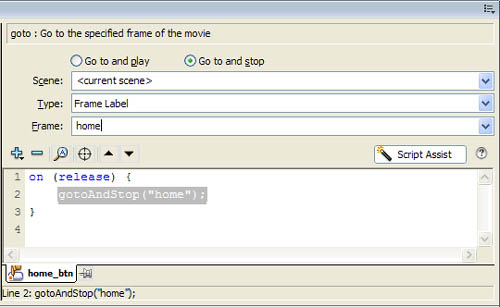
The changes you made with Script Assist mode are displayed in the ActionScript editor. You've just created a script without manually writing code in the ActionScript editor.
When you test the application, clicking the Home button will display the title "Home" in the Title movie clip, indicating that the Home frame is currently displayed.
Clicking the Home button displays "Home" in the Title movie clip.
You could repeat this process for the About, Products, and Contacts buttons. However, for these buttons you'll use an alternative and preferred method for creating scripts.
In each case, you want to display the related frames on the Timeline when each of the buttons are clicked; therefore, you will set the frame target of the gotoAndStop() function to the About, Products, and Contacts frames, as you've just done for the Home button.