Imported graphics are stored in the document's library. The library stores both the assets that you import into the document, and symbols that you create within Flash. A symbol is a vector graphic, button, font, component, or movie clip that you create once and can reuse multiple times.
So you don't have to draw your own graphics in Flash, you can import an image of a pre-drawn gnome from the tutorial source file. Before you proceed, make sure that you save the source files for this tutorial as described in "Open the finished FLA file", and save the images to the same directory as your banner.fla file.
|
1.
|
Select File > Import > Import to Library to import an image into the current document.
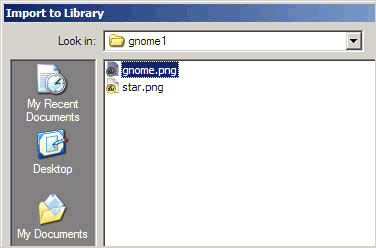
You'll see the Import dialog box (see the following figure), which enables you to browse to the file you want to import. Browse to the folder on your hard disk that contains an image to import into your Flash document.
|
|
2.
|
Navigate to the directory where you saved the tutorial's source files, and locate the bitmap image saved in the FlashBanner/Part1 directory.
|
|
3.
|
Select the gnome.png image, and click Open (Windows) or Import (Macintosh).
The image is imported into the document's library. Note You can drag assets from the library onto the Stage several times if you want to see several instances of the artwork. Your file size doesn't increase if you use several instances on the Stage. The SWF file only stores the information of the original symbol or asset from the library, and treats each instance like a duplicate.. |
|
4.
|
Select Window > Library to open the Library panel.
You'll see the image you just imported, gnome.png, in the document's library. |
|
5.
|
Select the imported image in the library and drag it onto the Stage.
Don't worry about where you put the image on the Stage, because you'll set the coordinates for the image later. When you drag something onto the Stage, you will see it in the SWF file when the file plays. |
|
6.
|
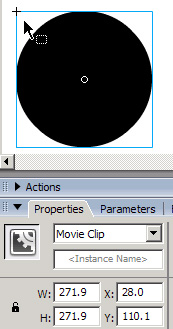
Click the Selection tool, and select the instance on the Stage.
If you look at the Property inspector you'll notice that you can modify the image's width and height, as well as the image's X and Y position on the Stage. When you select an object on the Stage, you can see and modify the current coordinates in the Property inspector (see the following figure). The X and Y coordinates match the registration point, which is the upper left corner of this movie clip symbol.
|
|
7.
|
Type 0 into the X text box, and type 0 into the Y text box.
Typing these values in sets the X and Y coordinates both to 0, as shown in the following figure. Set the X and Y coordinates using the Property inspector. Set the X and Y values to 0.
|
|
8.
|
Select File > Save to save the document before you proceed to the next section ("Introducing layers and the timeline").
Note You can also import sound files into your FLA files. This isn't covered in this tutorial, but you can find out more information in "Working with Sound" in Flash Help. |
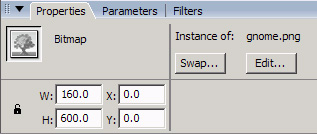 Setting new coordinates moves the upper-left corner of the image to the upper-left corner of the Stage. You can drag the bitmap image around the Stage using the Selection tool instead of changing coordinates in the Property inspector. Use the Property inspector when you need to set a specific position for an object, like you did in this step.