|
1.
|
On the main Timeline, select Frame 1 of the Actions layer.
|
|
2.
|
In the Actions panel toolbar, click Script Assist to display the Script Assist window.
|
|
3.
|
From the Actions toolbox, select ActionScript 2.0 Classes > Movie > Button > Events and locate the on(release) event handler.
Double-click the on(release) event handler to insert it into the ActionScript editor. Using the Actions toolbox to insert functions into the script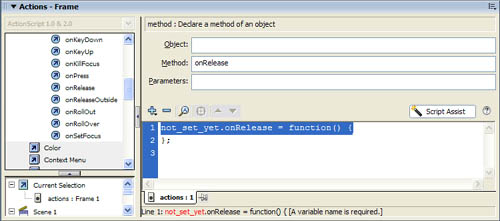 You'll notice that code placed on a timeline behaves differently than code placed on objects. In the previous example, you had to specify the target object for the on(release) event handler. This is because you're not adding the script directly to the object, but rather, you're referring to it from the code in the timeline. It also explicitly uses the function keyword to declare a function. You'll see how to use Script Assist mode to handle these in the following steps. You'll notice that code placed on a timeline behaves differently than code placed on objects. In the previous example, you had to specify the target object for the on(release) event handler. This is because you're not adding the script directly to the object, but rather, you're referring to it from the code in the timeline. It also explicitly uses the function keyword to declare a function. You'll see how to use Script Assist mode to handle these in the following steps. |
|
4.
|
Click in the Object text box.
On the Actions panel toolbox, the Insert a Target Path button is enabled. |
|
5.
|
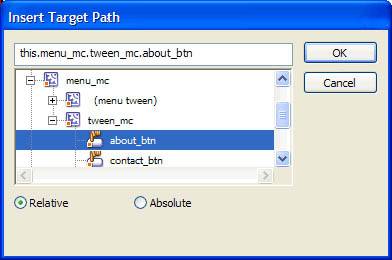
Click the Insert a Target Path button to display the Insert Target Path dialog box.
Selecting the target object from the Insert Target Path dialog box
|
|
6.
|
Select the About button (about_btn) from the tween_mc movie clip.
|
|
7.
|
Make sure that the Relative Path option is selected and then click OK.
The target object (the Menu tween) is added. The path to the target object is added to the event handler.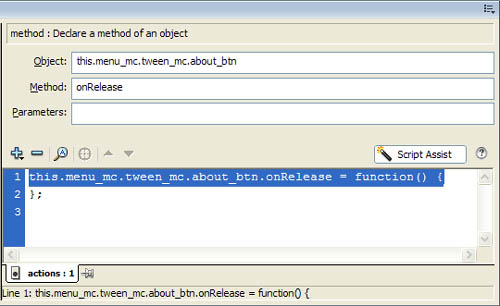
|
You now need to add the goto() function, the action that occurs when the About button is clicked.
|
1.
|
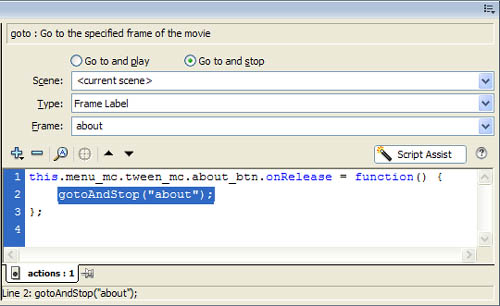
Using the Actions toolbox or the Add button on the Actions panel toolbox, select Global Functions > Timeline Control and insert the goto function.
|
|
2.
|
In the Script Assist pane, select the Go To and Stop option.
|
|
3.
|
Set the Type to Frame Label by selecting it from the Type pop-up menu.
|
|
4.
|
In the Frame text box, enter about.
|
The completed Timeline script
Repeat this process for the Products and Contacts buttons. In each case, when the buttons are clicked, you want to display the related frames on the Timeline; therefore, set the frame target of the gotoAndStop() function to the Products and Contacts frames as you did for the About button.
by updated