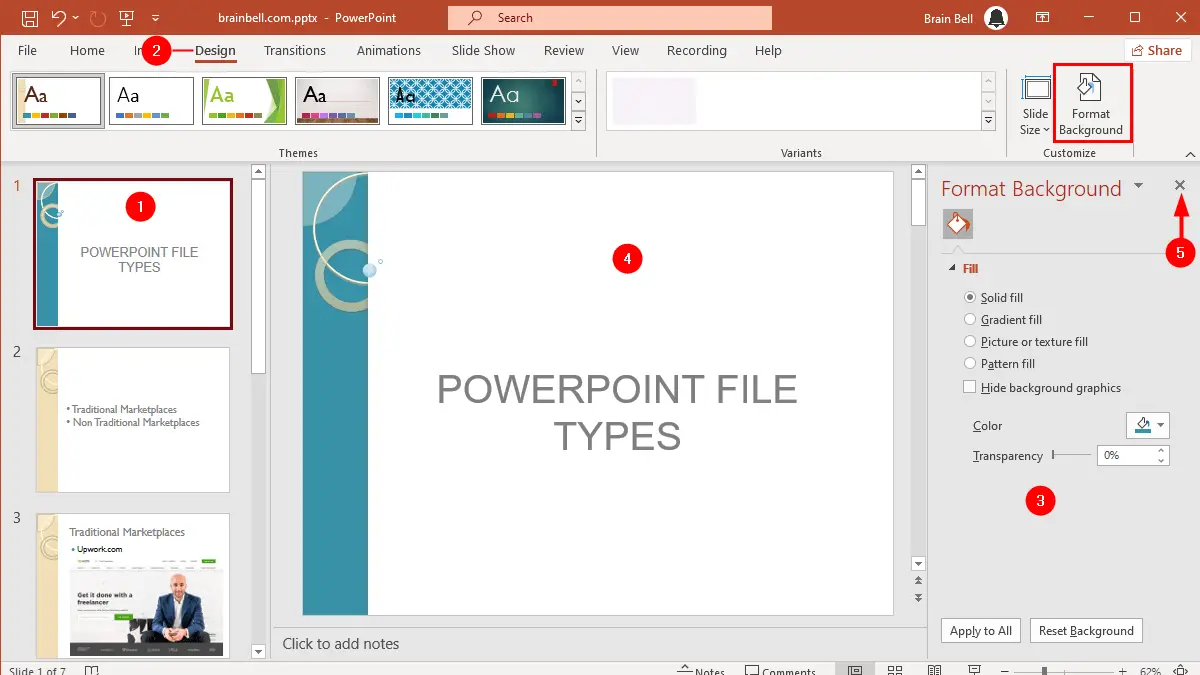
This step-by-step guide helps you to customize the background for a single slide without affecting the Slide Master or other slides in the presentation. Here’s how you can do it:
- Select the slide in the slide navigation pane on the left.
- Go to the
Designtab and click on theFormat Backgroundbutton in theCustomizegroup. This will open theFormat Backgroundpane on the right side of the screen. - You’ll see several options for customizing the background:
- Fill: This option allows you to choose a solid color, gradient, picture, or texture as the slide background. Select the desired option and make the necessary adjustments.
- Picture or Texture Fill: If you choose this option, you can select a specific image or texture to use as the slide background. You can also adjust the transparency and tile options for the picture.
- Gradient Fill: If you choose this option, you can create a gradient background with two or more colors. Adjust the direction and colors of the gradient to your liking.
- Pattern Fill: If you choose this option, you can select from various preset patterns to use as the background.
- Hide Background Graphics: If you want to hide the background graphics inherited from the Slide Master for this particular slide, check this option.
- As you make changes in the
Format Backgroundpane, the slide’s background will update in real-time, allowing you to see the changes as you make them. - Once you are satisfied with the background formatting, you can close the
Format Backgroundpane by clicking theXbutton in the top-right corner of the pane.
Note: Do not clickApply to All. Doing so will apply formatting to all the regular slides in your presentation. - Your selected slide now has its custom background, different from the rest of the presentation.
Keep in mind that customizing the background for a single slide won’t affect other slides or the Slide Master. It’s a great way to add emphasis or visual interest to specific slides in your presentation.
