Sometimes gathering information is minimal and may be done through only one page. However, when collecting data from users requires several pages of forms, you need to keep track of that information between posts. For example, most commercial Web sites employ a multistage checkout process. After placing a bunch of items into your shopping cart, you click "Check Out" and the site redirects you to a checkout page. From there, you are usually required to perform several distinct steps-setting up a payment method, confirming your order, and getting an order confirmation.
While you could code something like this in ASP.NET 1.x, ASP.NET 2.0 now includes a Wizard control to deal with this sort of multistage data collection.
If you were to develop a multistage input sequence, you'd need to build in the navigation logic and keep track of the state of the transaction. The Wizard control provides a template that performs the basic tasks of navigating though multiple input pages while you provide the specifics. The Wizard control logic is built around specific steps, and includes facilities for managing these steps. The Wizard control supports both linear and nonlinear navigation.
Using the Wizard Control
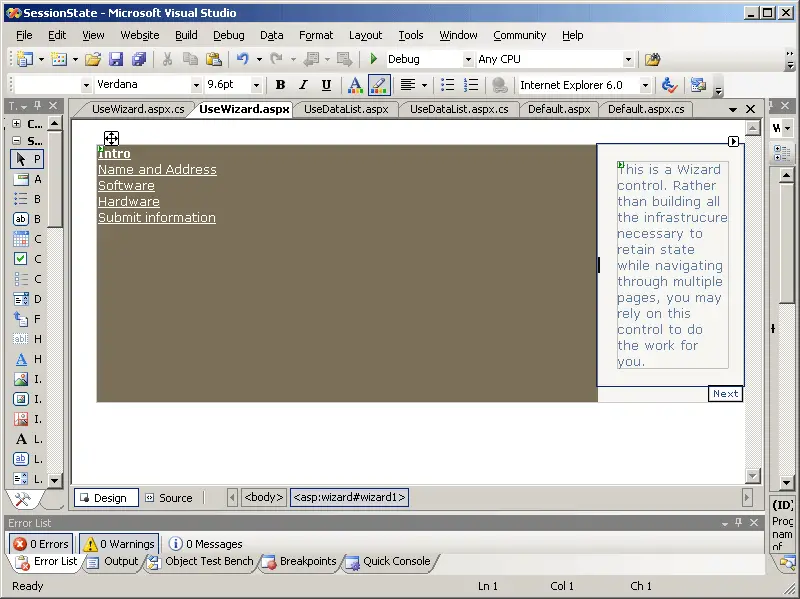
This example shows using the Wizard control to gather several different pieces of information from the client: a name and address, what kinds of software he or she uses, and the kind of hardware he or she uses. For example, this might be used to qualify users for entry into a certain part of the Web site or perhaps to qualify them for a subscription.
-
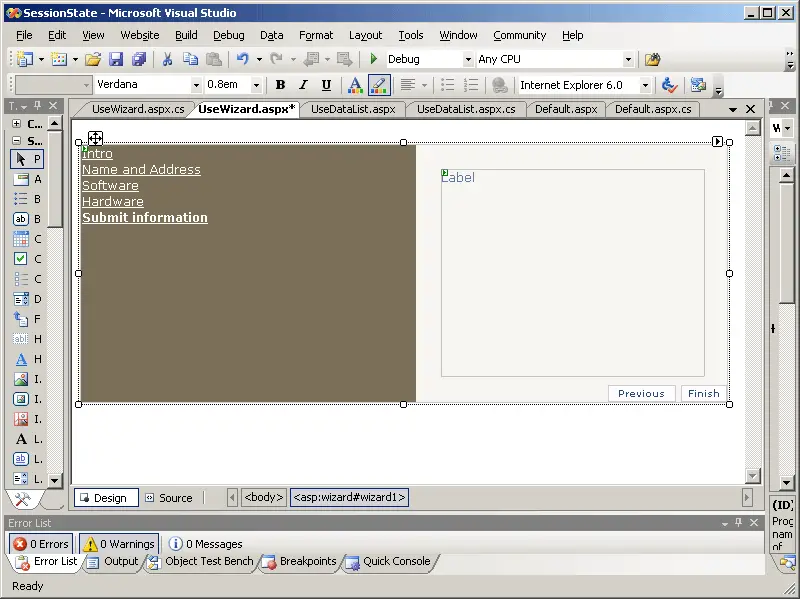
Create new page in the SessionState project named UseWizard.
-
Drop a WizardControl onto the page.
-
When the local menu appears in the designer, select Add Wizard Steps… to show this dialog box:

-
Add an Intro step, a Name and Address step, a Software step, a Hardware step, and a Submit information step. Make sure Intro is a StartNavigationTemplate.
-
Make sure the Submit information step is a FinishNavigationTemplate.
-
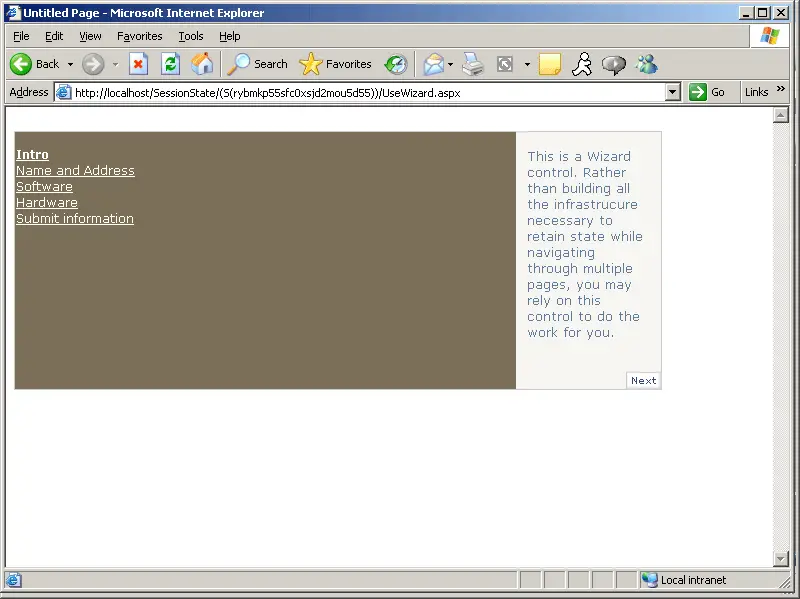
Add controls to the steps. The Intro step gets a label that describes what the user is entering:
-
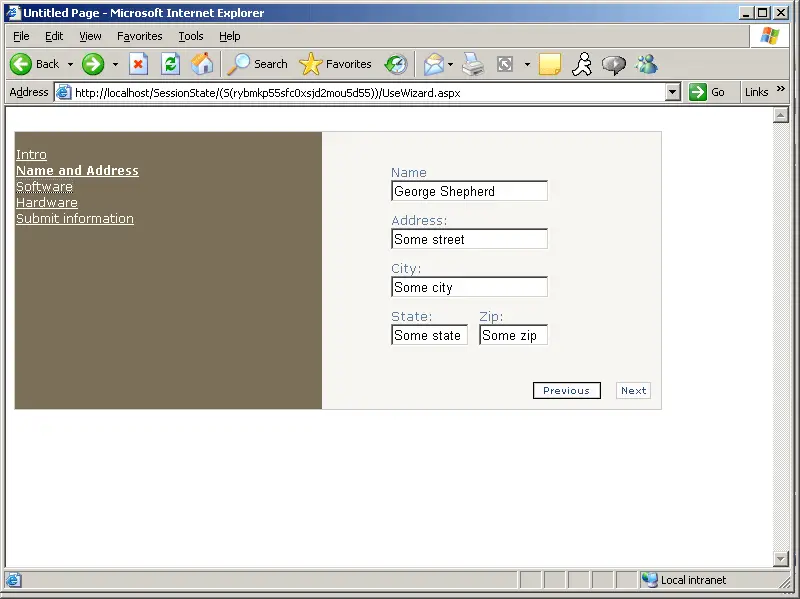
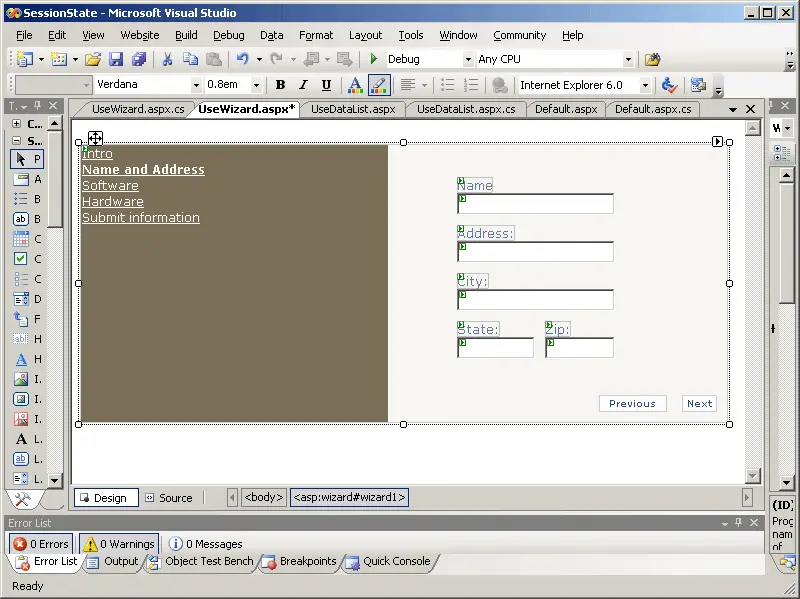
The Name and Address step should include labels and text boxes to get personal information. Be sure to give useable IDs to the text boxes. You'll need them during the submission step:
-
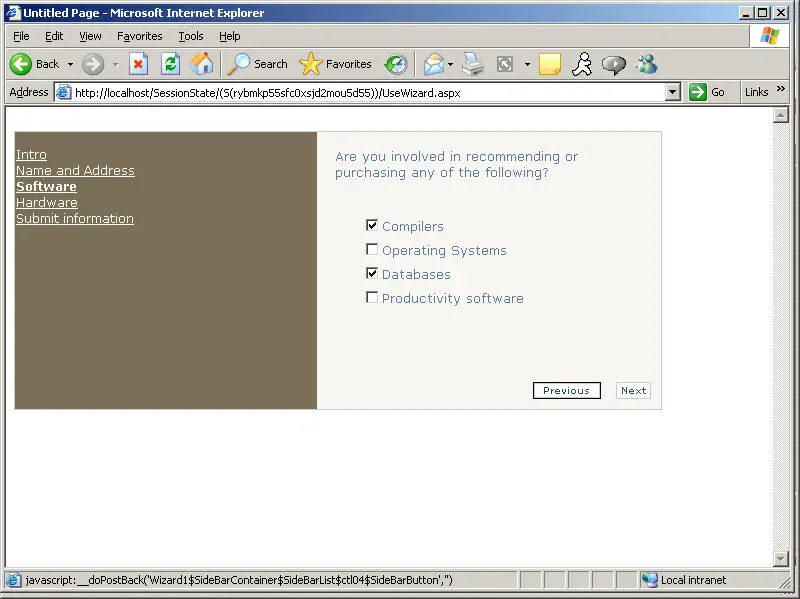
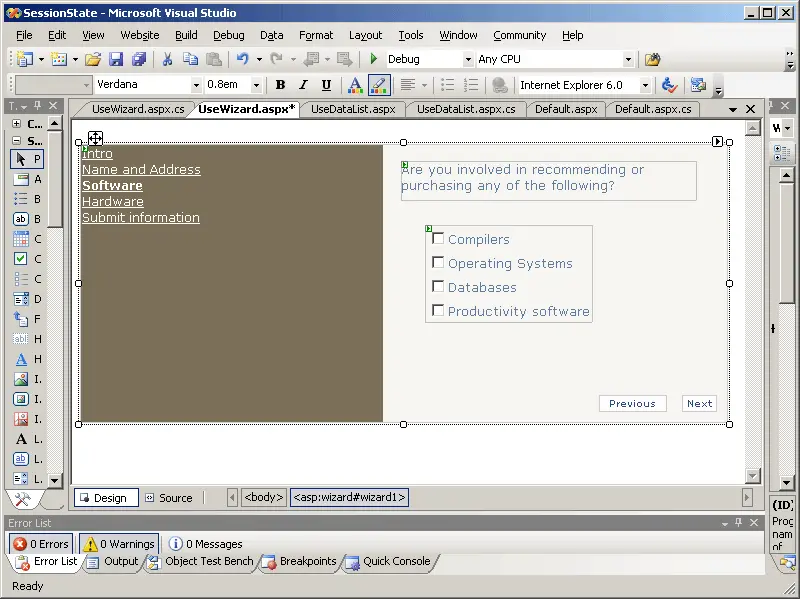
The Software step should include a list of check boxes listing common software types:
-
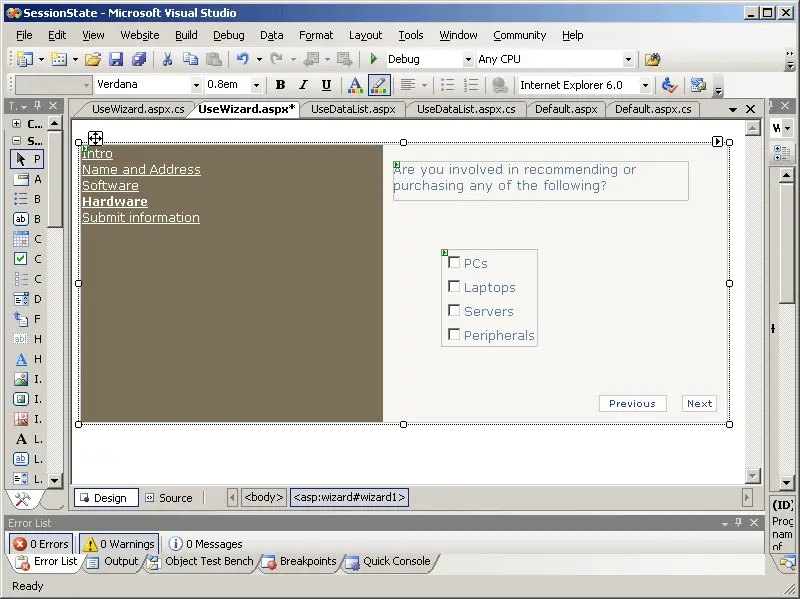
The Hardware step should include a list of check boxes listing common hardware types:
-
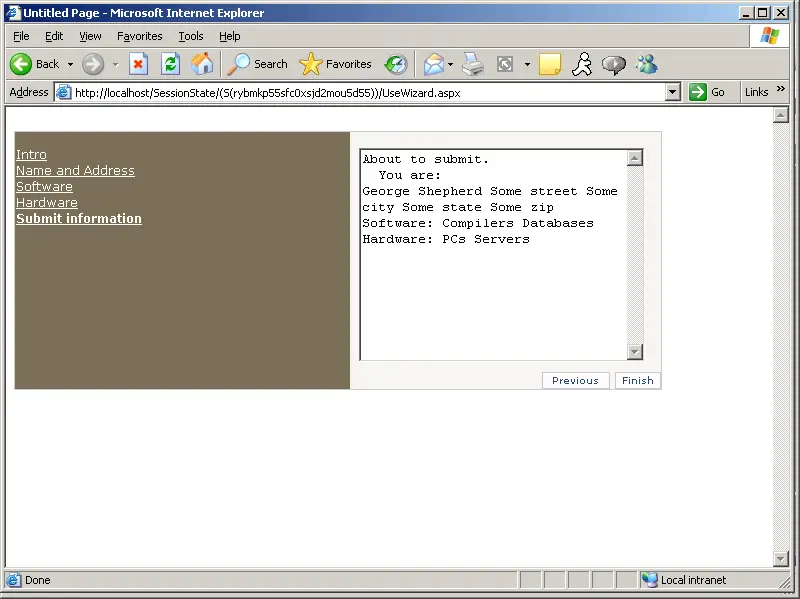
The summary information step (which you may use to show information before submitting) should include a label that will summarize the information collected. Name the label LabelSummary so you can use it to display the summary.
-
Finally, edit the Form_Load method to collect the information from each of the controls in the Wizard. The controls are actually available as member variables on the page. This information will be loaded every time the page is loaded. However, it will be hidden from view until the user selects the step. Double-clicking on the Wizard control will add a handler for the Finish button that you may use to harvest the information gathered via the wizard.
protected void Page_Load(object sender, EventArgs e) { String strSummary = "About to submit. \n "; strSummary += " You are: \n"; strSummary += this.TextBoxName.Text + " "; strSummary += this.TextBoxAddress.Text + " "; strSummary += this.TextBoxCity.Text + " "; strSummary += this.TextBoxState.Text + " "; strSummary += this.TextBoxZip.Text + " \n"; strSummary += "Software: "; foreach (ListItem listItem in CheckBoxListSoftware.Items) { if (listItem.Selected) { strSummary += listItem.Text + " "; } } strSummary += "\nHardware: "; foreach (ListItem listItem in CheckBoxListHardware.Items) { if (listItem.Selected) { strSummary += listItem.Text + " "; } } this.TextBoxSummary.Text = strSummary; } protected void Wizard1_FinishButtonClick(object sender, WizardNavigationEventArgs e) { // Do something with the data here } -
Now run the page and go through the steps. You'll see each step along the way and then finally a summary of the information collected.