Figure 2-27. Before: a picture of a lonely tree
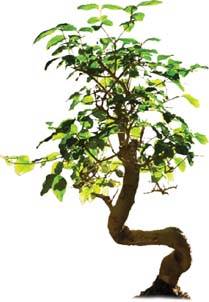
Normally, I would start a project like this by making a mask of the object. Masks will be covered in a later tutorial, so for now, we'll assume that the tree has been cropped out.
Figure 2-28. After: tree in its new environment with proper shadow
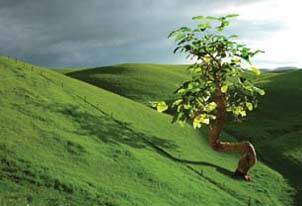
Creating a shadow for a complex object is a little more involved than the freehand shading we've done so far. In this section, we'll create a shadow for a more intricate object, the complex tree shown in Figure 2-27. By the time we get to the final image, Figure 2-28, we'll have replanted this tree on a hillside with the proper shadow intact.
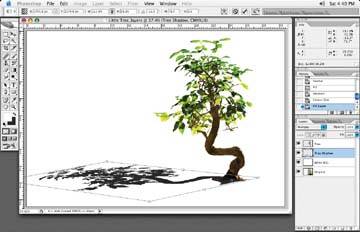
First, make a selection of the tree and create a new multiplied shadow layer. On the new multiplied layer, fill the selection with a 98% black, as I've done in Figure 2-29.
Figure 2-29. The tree selected and filled with 98% black

Next, select Edit » Transform Path » Skew. Move the transform center pivot point of the transform tool to the bottom of the tree, so that it will be the pivot point of the shadow, as in Figure 2-30. Then, adjust the corner handles and distort the shadow layer until the desired shadow angle is achieved. The desired angle of the tree shadow will of course be determined by the direction from which the light is coming.
Figure 2-30. Move the transform center pivot point to the bottom of the tree, and then adjust and distort the shadow to the desired angle
Let's say the sun would be coming from the right side of the image. You can see this if you look carefully at the tree trunk, as the right side of the tree has an orange glow to it from the sun and the left side of the tree is dark, or in the shadow area. This would mean that the tree shadow would fall to the left and be placed flat on the ground.
Figure 2-31. Create a vignette mask

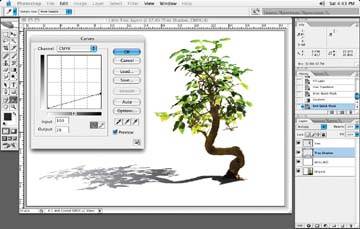
Figure 2-32. Lighten the shadow with the Curve tool
If there were an object on the ground to the left of the tree where the shadow falls, the shadow would shape or mold itself around and over that object. For right now, we'll assume that it is landing flat on the ground.
Shadows tend to get blurry the longer they extend out and their intensity starts to fall off, so once the shadow has been distorted to the correct position, I usually go into mask mode and create a fall-off mask, as in Figure 2-31. Then I can perform a tonal correction to the end of the tree shadow, typically lightening the shadow as is it falls off, as in Figure 2-32.
Keep in mind as well that, as a shadow gets closer to an object, it gets sharper with less vignetting occurring. The vignetted mask allows you to make these adjustments.
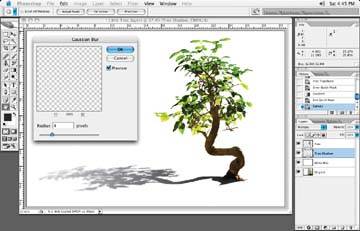
Typically, as shadows extend out father from their original object, they get less sharp and tend to get blurry. You can also use the same vignette mask that you used to lighten the tree shadow fall-off to add a Gaussian blur to the shadow, as shown in Figure 2-33. By using the vignetted mask, it makes it easy to blur the shadow as it falls off from the tree, because the vignetted mask has been created to allow for more correction as it falls off.
Figure 2-33. Correction made with a Gaussian blur added and a curve adjustment made to lighten the shadow as it falls off; of course, the mask is restricting these corrections
Another option would be to brush a fall-off and a varied degree of blur with the Brush tool and or a History brush.
Figure 2-34. As the mountain goes up, so does the shadow
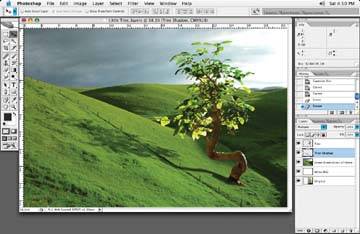
Finally, our tree is ready for its mountainside transplanting. But remember, when a shadow hits an irregular shape, the shape of the shadow will change, too. So when the shadow hits the mountainside, you may have to adjust, as in Figure 2-34.
You can alter your shadow by drawing the new shape with the Pen tool, and then filling it with color on a multiplied layer. You may have to soften it slightly to enhance the realism of it. Or, I occasionally use the Liquify tool if the object the shadow is hitting is an odd shape that has to be massaged into an equally odd shape.