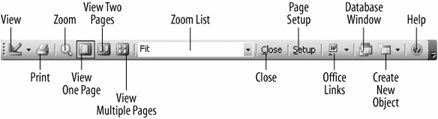
The Print Preview toolbar.
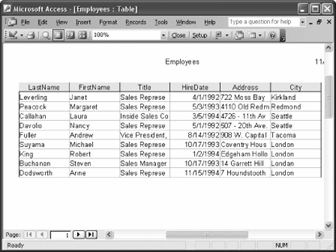
The Print Preview screen.
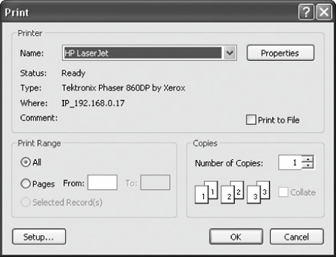
The Print dialog box.
Most database objects tables, queries, forms, reports, and pagesand the information they contain can be printed. Sometimes it's a good idea to preview a database object onscreen to see if something needs to be changed before sending it to the printer. You can preview a database object by clicking the Print Preview button on the toolbar.
-
Click the Tables icon in the Objects bar.
Access lists all the tables in the database.
-
Double-click the Employees table.
The Employees table appears in its own window.
-
Click the
 Print Preview button on the toolbar.
Another way to preview is to select File » Print Preview from the menu.
The datasheet is previewed on the screen, as shown in figure. You can enlarge the datasheet by clicking the area of the datasheet you want to magnify with the
 pointer.
 -
Move the
pointer over an area of the datasheet that contains data and click the mouse button.Access magnifies the selected area. Once you have seen an enlarged area, you can zoom back out to see the overall page again.
-
Move the
pointer over any area of the datasheet and click the mouse button.The datasheet returns to the previous preview size.
-
Select File » Print from the menu.
Other ways to print are to press Ctrl + P, or select File » Print from the menu.
The Print dialog box appears, as shown in figure. The Print dialog box allows you to specify options such as which pages to print and the number of copies you want printed. Table describes the options listed in the Print dialog box.
Normally, you would click the dialog box's OK button to print; however, we are going to save the paper and close the Print dialog box without .
-
Click Cancel.
Print Dialog Box Options
| Print option | Description |
|---|---|
|
Name |
Used to select what printer to send your file to when it prints (if you are connected to more than one printer). The currently selected printer is displayed. |
|
Properties |
Clicking on the Properties button displays a dialog box with options available to your specific printer such as the paper size you want to use, if your document should be printed in color or black and white, etc. |
|
Print Range |
Allows you to specify which pages you want printed. There are several options: All: Prints the entire document. Pages: Prints only the pages of the file that you specify. Select a range of pages with a hyphen (like 5-8) and separate single pages with a comma (like 3,7). Selected Record(s): Prints only the text you have selected (before using the print command). |
|
Number of Copies |
Specify the number of copies you want to print. |
TO PRINT PREVIEW:
-
CLICK THE PRINT PREVIEW BUTTON ON THE TOOLBAR.
OR...
-
SELECT FILE » PRINT PREVIEW FROM THE MENU.
FOR ADVANCED PRINTING OPTIONS:
-
SELECT FILE » PRINT FROM THE MENU.
-
REFER TO TABLE FOR INFORMATION ON VARIOUS PRINTING OPTIONS.
TO PRINT:
-
CLICK THE PRINT BUTTON ON THE TOOLBAR.
OR...
-
SELECT FILE » PRINT FROM THE MENU.
OR...
-
PRESS CTRL + P.