The Problem:
I need to use different headers on different pages, but I can't find the options I need.
The Solution:
Word's headers and footers are plenty confusing to start with, but once you've learned what the different options are and where they hide, you can create a wide range of headers and footers.
Choose File » Page Setup and click the Layout tab (see Figure 4-18). Check the "Different first page" box if you just want a different header or footer on the first page. (This box is also useful when you want headers and footers on every page except the first.) Check the "Different odd and even" box to use different headers or footers on facing pages, as is done in most books.
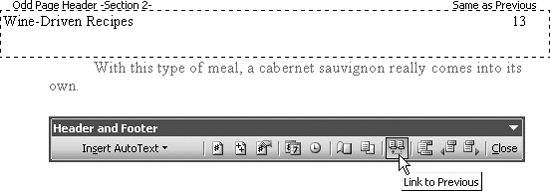
If different headers on the first page or on odd and even pages is all you need, close the Page Setup dialog box, choose View » Header and Footer, and enter suitable text. But what you'll often need to do is divide your document into sections (by using Insert » Break). Each section can then have its own header and footer. By default, each section after the first picks up the header and footer from the first section (assuming that section has a header and footer). Click the "Link to Previous" button on the Header and Footer toolbar (see Figure 4-19) to break the link with the previous section, and then create the new header or footer for the section you're in.
Figure 4-18. The Layout tab of the Page Setup dialog box is the place to start arranging complex headers and footers.
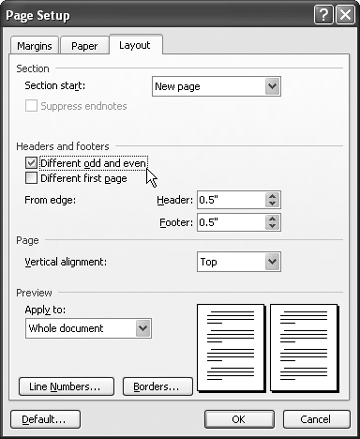
Figure 4-19. To create a different header or footer in a section, you must break the default link to the previous section's header or footer.
Another option that's often useful is to use the same header or footer throughout a document, but insert in it the closest heading of a particular level. See the next Annoyance for details.