Word always tries to be helpful by adjusting the columns and rows of a table to fit the text inside them. However, this may not be what you want sometimes. You may need to have columns and table of a fixed size instead.
Use Insert Table dialog box
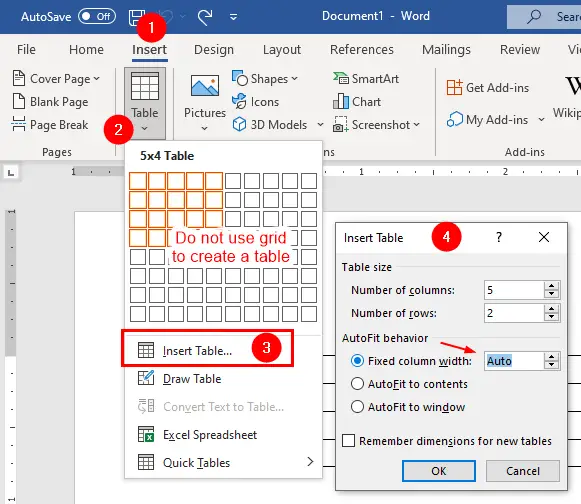
To prevent Word from resizing the columns, insert a table by using the Insert Table dialog box (see following Figure) rather than by using the predefined grid of cells and "painting" out a table grid.
To insert a table using "Insert Table" dialog box, you can use the following steps:

To prevent Word from resizing your table columns, select the "Fixed column width" option in the Insert Table dialog box.
- Click on the
Inserttab on the ribbon. - Click on the
Tablebutton in theTablesgroup. - Choose
Insert Tableoption. - Specify the number of columns and rows.
- Select the
Fixed column widthsoption and specify a width rather thanAuto - Click OK.
Turn off AutoFit
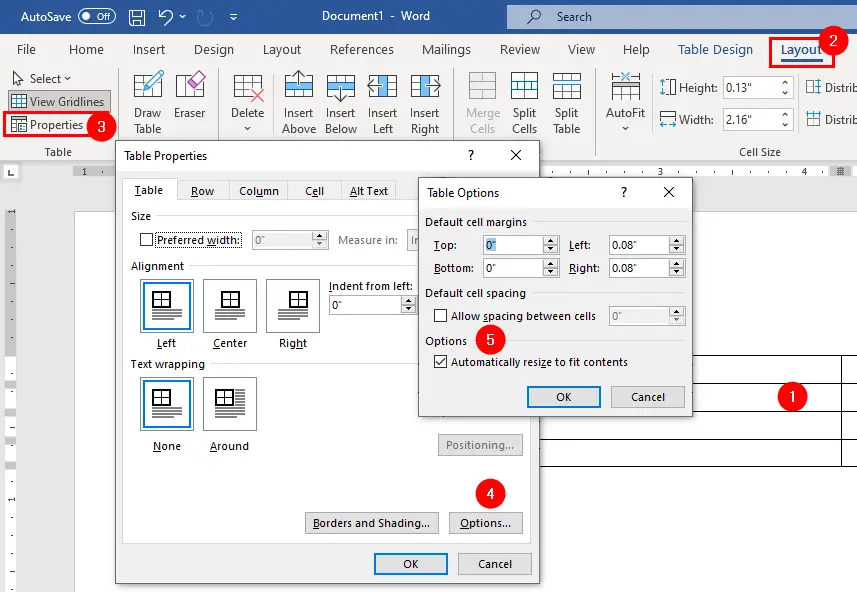
Turn off the Automatically resize to fit contents option if the table is already inserted in your document with AutoFit turned on:

You can also turn off AutoFit in an existing table.
- Right-click in the table, choose
Table Properties. - Click the
Tabletab if it's not already displayed. - Click the
Optionsbutton - Uncheck the
Automatically resize to fit contentsbox, - Click the OK button to close each dialog box (see above Figure).
Use Table Properties dialog box
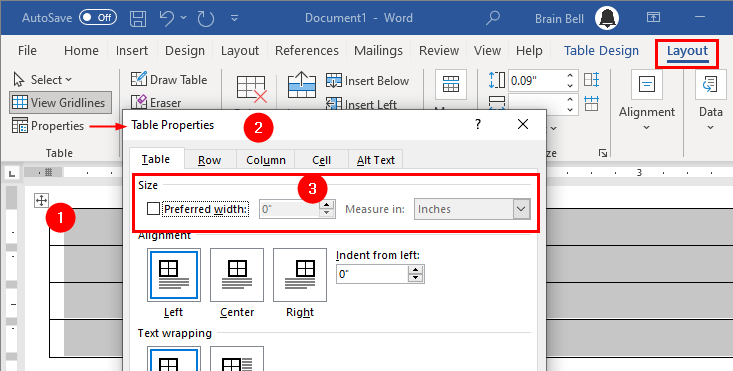
If the table is already inserted in your document, you can use the Table Properties dialog box to prevent a table from expanding by specifying the width of the table itself or its columns. Follow these steps:

- Select the table (or columns)
- Open
Table Propertiesby:- Right-click in the table, choose
Table Properties. - Or click the
Layouttab and click thePropertiesbutton in theTablegroup.
- Right-click in the table, choose
- Click the
Tabletab, check thePreferred widthbox and specify a width for the entire table. - OR, click the
Columntab, check thePreferred widthbox and specify a width for the selected columns. - Click OK.