
Sometimes you want to display negative time values, but Excel will only display ######. There are several ways to escape this problem.
If you enter the time 12:00:00 (midday) into any cell and then format it as General, you will see that it has a numeric value of 0.5. Similarly, enter the time 24:00:00 in any cell. Look in the Formula bar and you will see that Excel shows 1/1/1900 12::00::00 AM.
Excel sees dates and times as nothing more than numbers. In the case of a date, by default Excel considers 1 January 1900 to have a numeric value of 1; 2 January 1900 a numeric value of 2; and so forth. Times are seen as decimals, with the exception of midnight, which has a numeric value of 1. (See Excel Date and Time for full details.) Because of this, Excel has real trouble coping with the notion of negative time.
Here are three methods to get Excel to display negative time values.
1) Use 1904 Date System
One quick and easy way to display negative values is to simply use the 1904 date system. The 1904 date system is also called Macintosh dates and times:
- Click
Filetab. - Click on
Optionsin the Backstage view. This will open the Excel Options dialog box. - Select
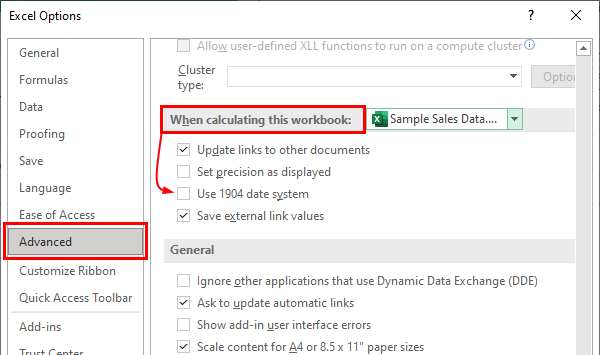
Advancedfrom the left-hand navigation pane. - Scroll down to the
When calculating this workbooksection. - Check the box labeled
Use 1904 date system. - Click OK.
Be aware that doing this will cause Excel to change the starting dates from which all cells are calculated from “1 January 1900” to “2 January 1904”. Changing this option will affect only the workbook in which you make the change.
Now you will be able to subtract times from each other and have the result displayed as a negative time value. Try it:

Enter 5:00:00 AM in cell A2. In cell A3, enter 6:00:00 AM. In cell A4, type =A2-A3.
You will get the result of -1:00, but only if you checked the 1904 date system checkbox as described earlier.
If changing Excel’s default date system to the 1904 date system is likely to cause problems within the workbook for other time calculations, you need to use another method that will change the appearance of a cell housing a negative value.
2) Using the TEXT Function
The second method requires the use of the TEXT function. To begin, enter 5:00:00 AM in cell A2. In cell A3, enter 6::00:00 AM. In cell A4, type the following:
=TEXT(MAX($A$2:$A$3)-MIN($A$2:$A$3),"-H::MM")With this nested formula, you are subtracting A3 from A2 to give a positive time value. Then you are formatting the cell using the TEXT function so that it shows a negative time. Using the combination of the MAX and MIN functions ensures that you are always subtracting the earlier time from the later time.
You need to be aware that the result returned is actually a text value, not a numeric value, in case you intend to use the result in another formula.
3) Using a Custom Format
One final way you can display negative times, without changing to the 1904 date system and still returning a true numeric value, is to:
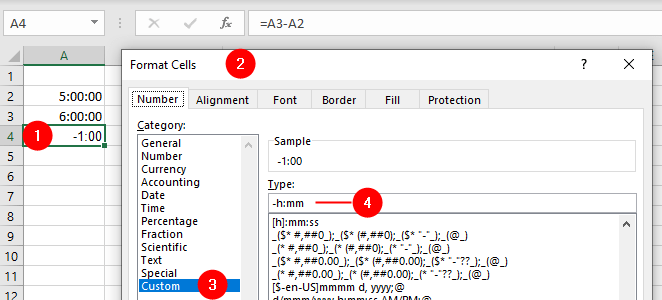
- Select the cell
- Open the
Format Cellsdialog box (CTRL+1) and selectNumbertab - Use a Custom format of
-h:mm.
This method works only if you always want a negative time value displayed. It also requires that you always subtract the earlier time from the later time. This means all times returned really will be positive and will only appear negative.
So, by using any one of these three methods, you will be able to display negative times. Just remember that there are pitfalls to each of them, so always use them with these pitfalls in mind.
Date and Time
- How Date and Time Feature Works in Excel
- Calculate Date and Time
- Display Negative Time Values
- Count All Occurrence of a Specific Day in a Month or Two Dates
- Calculate Working Days and Holidays
- Determine Deadlines, Schedules, or Due Dates
- Show Total Time as Days, Hours, and Minutes
- Format Date and Time Values