Here are quick methods you can use to identify the referenced ranges for each named range:
Go To
To quickly find a named range you can use the Go To dialog box. This dialog box allows you to navigate to specific named ranges on a worksheet.
To access the Go To dialog box:

- Press the
F5key or use the keyboard shortcutCtrl+G. - OR, go to the
Hometab in the ribbon, and click on theFind & Selectbutton in theEditinggroup. From the dropdown menu, selectGo To….
In the Go To dialog box, you can scroll through the list to locate the desired named range.
Once you have selected the named range, click on the OK button. Excel will automatically navigate to the cell or range associated with the named range.
Use in Formula
The Use in Formula command allows you to quickly and easily insert named ranges into your formulas:
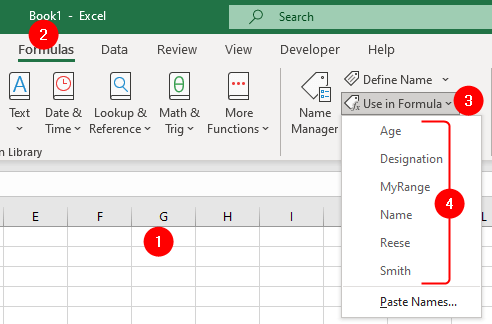
- Select the cell where you want to insert the named range.
- Navigate to the
Formulastab in the ribbon. - Click on the
Use in Formulabutton. - A drop-down menu will appear, displaying a list of all the named ranges in your workbook.
From the drop-down menu, select the named range you want to insert into your formula. Excel will automatically insert the range reference into the formula, saving you the time and effort of manually typing it.
Use Paste Names to List All Names
One very quick way to identify referenced ranges is to use the Paste Name dialog box:
- Press
F3or - Navigate to the
Formulastab in the ribbon, click on theUse in Formulabutton and choose thePaste Names.
In the Paste Name dialog, click Paste List.
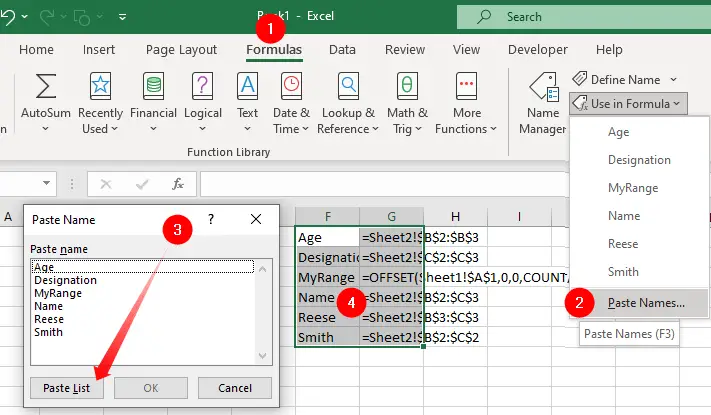
Paste List button to display all named rangesExcel will list all names in rows, starting from your active cell, with the names’ corresponding references in the opposite column.
Manage Names using Name Manager
The Name Manager allows you to view and manage all the named ranges in your workbook, not just in a specific worksheet. The Name Manager allows you to perform various actions on named ranges. You can edit their references, change their names, delete them, or modify their properties.
To access the Name Manager dialog box:
- Press
CTRL+F3or - Navigate to the
Formulastab in the ribbon and click on theName Managerbutton.
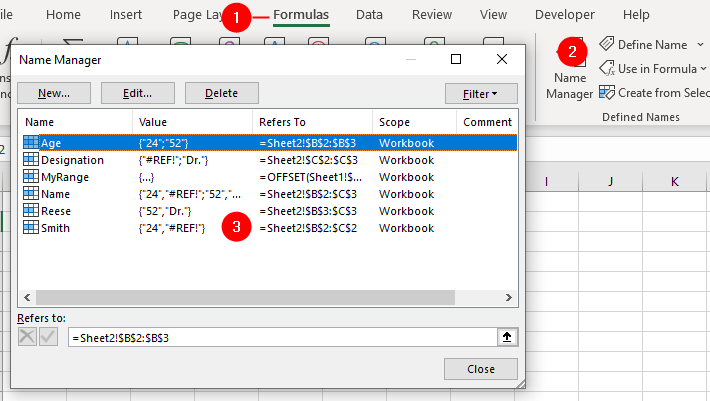
This will open a dialog box that displays the list of all the named ranges in the workbook. You can scroll through the list to locate the named ranges you are interested in. The names of the ranges, their respective references, and additional information such as the scope and comments will be displayed.