You can add any of these types of text using the Text tool. For this exercise, you will add some static text to the Stage for decorative purposes. To add static text, follow these steps:
Open the banner.fla file you created in Part 1 of this tutorial, and rename the file banner2.fla.
Note
If you didn't finish Part 1 of this tutorial, or lost your file, open the source files ZIP archive that accompanies this tutorial. Inside the start folder, find banner2.fla and use this file to begin the tutorial.
|
1.
|
Select Insert > Timeline > Layer to insert a new layer. Double-click the layer's name and type text to rename the layer.
|
|
2.
|
Select the Text tool in the Tools panel, which looks like a large letter A button.
|
|
3.
|
Click near the top of the Stage, and type Overworked? into the field that's on the Stage.
|
|
4.
|
Select the text field (a bounding box appears around the text when you select it).
|
|
5.
|
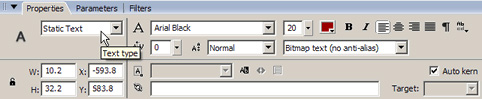
Open the Property inspector (Window > Properties > Properties), and make sure Static Text appears in the Text type pop-up menu.
|
|
6.
|
Change the font of the text to whatever font you prefer.
You change the font using the Font pop-up menu (next to the A icon, seen in the following figure). |
|
7.
|
Select Bitmap text (no anti-alias) in the Font rendering method pop-up menu.
Anti-alias options help small text appear clearly in your applications, but it makes large text look jagged. Because you're creating large text for the banner, you should use bitmap text which appears smooth when you create large text. |
|
8.
|
Change the size of the font to 20 points using the Font size pop-up menu.
Then you will need to change the font size so the text fits on the Stage. Change text settings in the Property inspector.
Add some static text to the banner. Select any font you want to use.
|
|
9.
|
Select the Text tool again, and type Underpaid? below the text you added previously.
|
|
10.
|
Select the text field, and open the Property inspector, and then change the text to the same font you selected in the earlier steps.
|
|
11.
|
Select a font size so the text is large but still fits on the Stage.
|
|
12.
|
Repeat steps 9 through 11 to add the phrase Gnome? below the previous two lines of text. When you finish, your banner will resemble the first figure in this tutorial that displays the complete file for Part 2.
|
|
13.
|
(Optional) Open the Align panel (Window > Align) to align the text to the center of the Stage. Select a text block on the Stage, click To stage in the Align panel, and then click Align Horizontal center. (Move the mouse over a button in the panel to see what its name is.)
|
|
14.
|
Select File > Save to save your progress before moving on.
After you finish saving the file, proceed to the following exercise, "Creating a symbol". |
 When you finish, the text should be similar in size and in position to the text in the following figure.
Note
For advanced text effects, you can create text in FreeHand, save the file, and import it. Also, if you're using Adobe Illustrator, you can export the text as a PNG or SWF file. You can then import this text into Flash. You might also investigate FlashType advanced anti-alias options. See "About FlashType" in Flash Help for information.