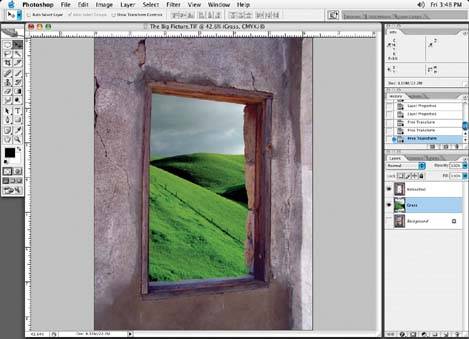
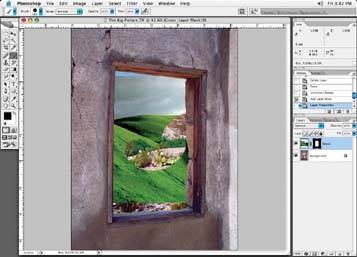
Let's say we wanted to replace the image seen within a frame or window, like putting the green valley in place of the desert view in Figure 6-33.
Figure 6-33. A picture frame and a new image that will be going into the center of it
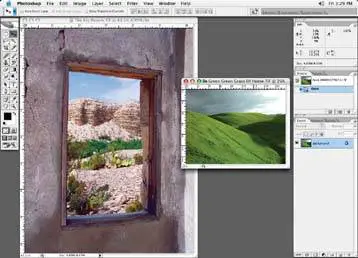
There are a couple of different ways you can isolate images for a situation like this. The easiest way is to first create a selection or mask of the inside of the picture frame where the new image is to be placed with one of the selection methods discussed.
Once the selection is made, you can use this selection as a layer mask, which will not physically crop the picture frame element, but apply a mask that will allow the center of the picture frame to become transparent so you can see an image through the center of the frame where the selection was made. Think of it as becoming transparent or hollow.
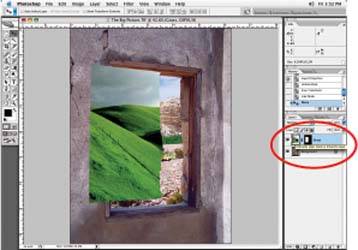
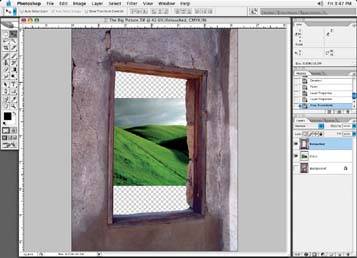
A layer mask is applied by choosing the Layer » Layer Mask » Hide selection from the menu bar. However, assuming a selection is made of the window area in this case, if you simply copy the image that will be used as your window image and choose Edit » Paste Into, Photoshop will create a layer mask for you automatically. In Figure 6-34, the grass layer has been pasted with the Paste Into command. A layer mask is created automatically. I've renamed my new layer.
One nice thing about a layer mask is that it can be discarded or deleted at any time without affecting the original picture element, or it can be modified and reapplied.
There is one option for your layer mask. Note the little lock or chain icon between the picture icon and the layer mask in your Layer palette, shown Figure 6-35. If there is a lock between these two items, they will move together. If the link is clicked off, the image can move within the layer mask.
Figure 6-34. Use the Paste Into command to insert the grass image
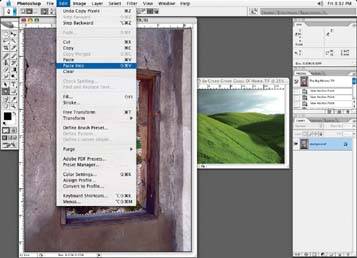
Figure 6-35. If the lock icon is on, the layer mask and the picture move together
Just as matter of interest, if you find that your cropping of the picture frame could use some fixing up in spots, you have a couple of options. You could delete your layer mask, remake your selection, and then reapply the layer mask.
If you find the edge of your mask needs softened or the shape could be improved, you could click on the layer mask associated with your picture frame so that it is highlighted in the Layer palette, and use your paint brush to paint more or less layer mask material (see Figure 6-36). Use the X key to add or remove your layer mask material with the Brush tool, assuming of course your Color Picker is set to black and white. Remember this affects only the mask and not the image, so you are not harming the image.
Figure 6-36. Painting on the layer mask to reveal the original image of the window frame
Another option is to take your picture frame element with the selection of the inside of the picture frame and to simply hit your Delete key to delete the information in the center of your picture frame element, as in Figure 6-37. Of course, the information you delete will be gone forever, but the center of the picture frame will be cropped out!
Figure 6-37. The center of the frame has been deleted
In either case, once the center of the picture frame element has been cropped out, you can create another layer of the image you wish to paste into the center of the picture frame. This image would be placed on a layer below or behind your picture frame layer and can be resized, rotated, and distorted within your picture frame selection regardless of which method is used. Figure 6-38 shows the final composition.
Figure 6-38. The final composition