On occasion I am asked to take a static object and add motion to it so that it appears to be moving. You can add motion to objects in a couple of different ways. For instance, you might be asked to make a lateral motion, like when a car or person goes racing by. Motion could be added to make an object to appear as though it were spinning. Motion could also be added to make an object appear as though it is coming toward or traveling away from us. So how do we create motion where there was none?
Changing the shape of the mouth also means imagining what smiling will do to eyes, cheeks, etc.
Adding Motion to a Car with Motion Blur
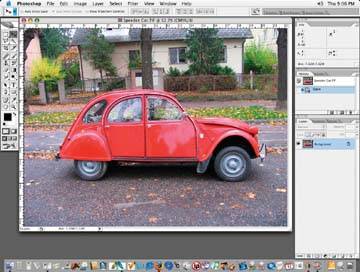
Adding motion to cars is typical request. This is often done because the client or manufacturer does not want to put excess mileage on to the vehicle or run the risk of damaging a new car. In this example, we'll take the car out of its stationary background and add motion to the background and the wheels. Following figure shows our sample vehicle standing perfectly still.
A stationary vehicle
First, create a selection with the Pen tool. Make sure the selection is accurate by following the object exactly and by using as few points possible on your mask to keep it smooth and fluid. Depending on the how the rest of the image looks, I'll occasionally add a small degree of softness to the selection by choosing Select » Feather prior to isolating the vehicle. Once a selection of your object has been made, go to Layer » New » Layer via Copy to paste the selection on a new layer. Then give the new layer a descriptive name.
Once the vehicle is cropped and pasted on to a new layer, use the Clone brush to remove the vehicle or a good portion of it out from the original background. You don't have to get too fancy retouching the background, as you are going to blur it anyway, which will hide any brushing you may do. (Unless, of course, you're only going to blur the background to small degree; then brushing the car out of the background may be a little more critical.)
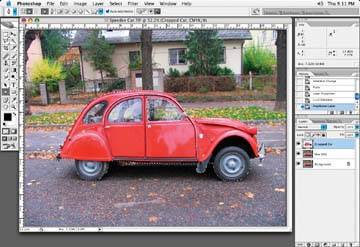
You should be left with cropped vehicle on a layer and an image that is the background with much of the car retouched out, particularly around the edges.
Our car is cropped out and pasted on to a new layer and a background layer with much of the car cropped out
Next, clone a portion of the car out of the background, because as you add motion blur to the background, the original car will blur as well and extend well outside of the original static car, if you clone some of it out. If I drop the cropped image of the car back onto a blurred background, the original car, if not airbrushed out, will be poking out around the edges because of the blur. The amount of image that has to be cloned out depends on how much blur is added. (The faster you want your car to go, the more blur should be added.) If the original car is not retouched out around the edges, when motion is added, ghosting will occur and bring the background car image through, an effect you can see in figure below. A car speeding forward would not have motion lines coming from the front of the car, unless it was rocking back and forth!
Ghosting can occur if the car is not properly selected
Note: The original file is kept on a layer just in case I ever have to go back to it for any reason.
Once the car has been cloned a sufficient amount, you can create the motion blur. Start by selecting Filters » Blur » Motion Blur. Choose the angle of your blur carefully it is important. The blur angle should match the angle of your object to appear natural. You do not want a blur that shoots off into space when the object is going from left to right.
Make sure the angle is set correctly so your car doesn't shoot off into space
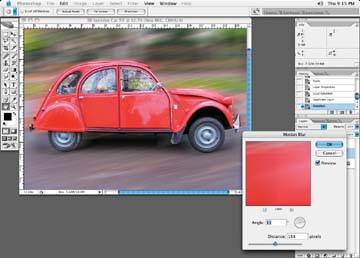
To avoid shooting your car off into space, set the motion blur angle to the same angle as the direction in which the car is traveling. You can judge this by setting the blur to match the two points between where the wheels of the car touch the ground. Following figure shows how the image appears after applying motion blur at the correct angle.
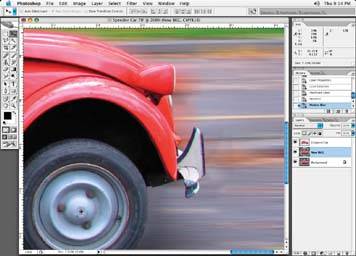
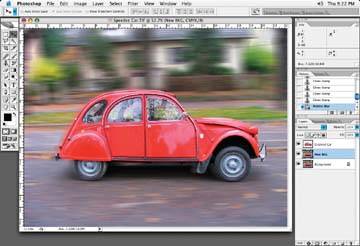
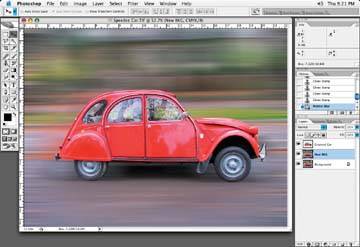
The amount of blur you choose is important, too. Some experimentation will be necessary. The faster you want your object to appear, the more blur you will want to add. Notice how much faster the car appears to be moving in following figure than in next figure. Keep it real, though. Don't add a blur that makes the object appear as though it is traveling at 500 miles per hour when it is actually a person strolling down the street!
Use the wheels of the car to set correct motion blur angle for background
If you have an image with a reasonable amount of foreground and background, you can apply motion blur in two steps or use a vignetted mask. To do the blur in two steps, first add a motion blur you think would be suitable for the background of the image or the portion behind the main object. Then apply this blur to the overall image. Next, add more blur so that the foreground or the part of the image in front of the main object is blurred more than the background behind the main object. To put it in perspective, as a kid, did you ever hang your head out of your parents car window as it traveled down the highway to watch the speeding guardrail whiz by only to look up and see the horizon speed by much more slowly? OK, maybe it was just me, but hopefully you get the idea. What you are trying to create here is a fast moving foreground and a slower moving background or horizon.
More blur increases the perception of speed
Because the foreground is visually closer, the amount of blur will be more in the foreground. Add less to the background of the image the farther away it is. To accomplish this, make a mask of the background. Either make a very soft mask so the transition is very subtle, or if there is a harder object that is in foreground, like a guard rail, where it is suitable for separating the background and foreground, make the mask a little more defined.
Less blur means a more leisurely pace
You can create this type of motion in a couple of ways. One way would be to apply one motion blur overall that is suitable for the background, apply a second blur that is more suited to the foreground, take a History snapshot of the blur, and then paint it into only the foreground of your image. The History brush will be discussed in greater detail later on in this tutorial.
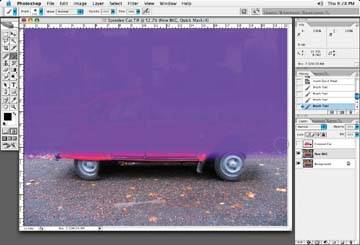
The second way to accomplish this dual blurred effect is to create a selection or mask of the foreground and, by inverting the foreground mask, you'll have a selection for the background, and vice versa. In this way, two different blurs in following figure. Using the Quick Mask function to display the next figure. The effect of the motion blur applied to the can be added to the background for a much more realistic look.
Using the Quick Mask function to display the mask selection
A third way would be to use the Quick Mask mode, select the Vignette tool from the Tool palette, and create a vignette that goes from the top to the bottom of your image. Once out of Quick Mask mode, make a selection through which you can blur the image. If you have made the vignette mask correctly, wherein the bottom part of your vignette mask has more color in it, then the bottom of the image will be affected more by the blur correction.
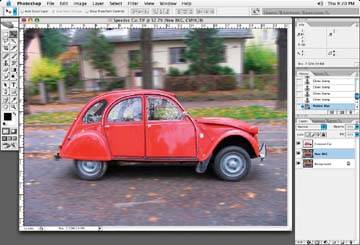
Next, go back to Picture mode and apply a motion blur to the back through the mask. The result should look like following figure.
The effect of the motion blur applied to the background through the mask

The selection is inverted, and a smaller blur is added to the foreground. The only problem with this image is that no one is driving! I'll guess I'll have to fix up the windows so no one can see through them!
Typically, the car is what is "caught" with the camera, so the details of the car are sharp, or much sharper than the rest of the image. To finish this image, add a motion blur to the reflections in the windows (see the note) and a radial blur to the wheels and tires, technique we'll cover in the next section. Applying a motion blur in this fashion will make a blur more realistic.
Note: Don't forget about the information in the windows of a car! If the car is moving, the background in the windows should reflect that. Select the window(s) with any selection tool, and apply the same amount of blur to them as you did for the background blur.