For cloning straight edges, hold down the Shift key and click along the length of the edge you are trying to fix (Figure 3-30).
Figure 3-29. One Clone tool point reads the information, and the other writes that information; sometimes the information repeats itself: a very undesirable effect
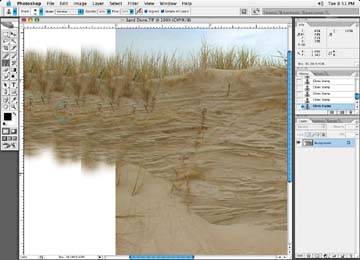
Figure 3-30. Before: cloning an edge of an image with the Shift key

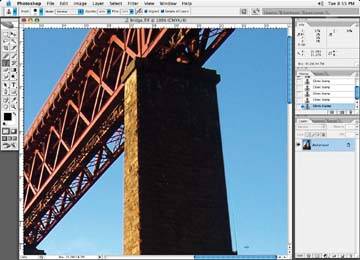
By holding down the Shift key, the Clone brush will follow your every click (Figure 3-31).
Figure 3-31. After: cloning an edge of an image with the Shift key (the second point is clicked while holding down the Shift key)
Cloning Human Faces
I like to use human faces to demonstrate corrections because everyone knows what a face should look like, and if anything is off, people will notice. This forces me to get it right! To smooth out rough skin or some other rough surface, use the Clone brush set to a very low opacity (Try 20% and adjust it from there if necessary). Massage the area constantly by changing the brushes so you don't get any repeat patterns. See Figure 3-32.
Figure 3-32. Smooth out an area with the Clone tool
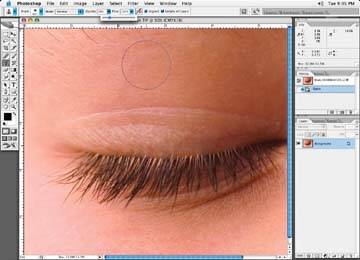
Keep the brushes moving and change their positions in relation to each other often so that no one area repeats itself. Depending on the rest of the image, add a bit of noise to the area to break up the smoothness of the area retouched (Figure 3-33).
If you zoom in on your image to a large degree, you will notice that there is a texture in the image that isn't perfectly smooth. When painting in color with a brush, or cloning or filling an area with color, these techniques create an unnaturally smooth texture, and can stand out in the image. Adding a small amount of noise helps break up these areas and blend them in with the rest of the image.
Figure 3-33. Add noise to keep the image from looking too retouched
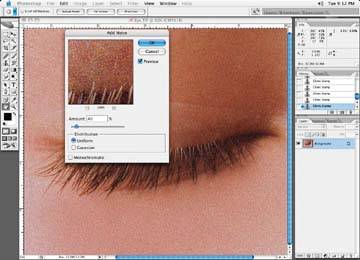
The Noise dialog box offers a couple of options. You can select a Distribution of Uniform or Gaussian. Gaussian tends to place the noise more randomly, which is preferable. The amount you set is purely a visual thing, and you must experiment with this control to see what best suits the look of the rest of the image. Monochromatic is usually ticked off, and you probably won't need it unless you have a four-color black and white-looking image.
Be careful not to add too much noise, as it will become quite noticeable. Have a good look at your image before you decide on the amount you wish to use.
I rarely use custom brushes, except when cropping hair, which will be covered later in this tutorial.
Cloning Cloth or Similar Textures
If you are brushing in something with a pattern like that of cloth or a texture, I would increase the brush hardness otherwise, the edges become diffused and look out of focus. I see many people making the mistake of setting the brush too soft when cloning patterns and material with the Clone tool. Note the diamond-shaped halo around the pointer in Figure 3-34.
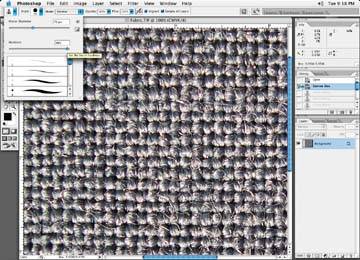
Set your brush to a harder setting, as Figure 3-35.
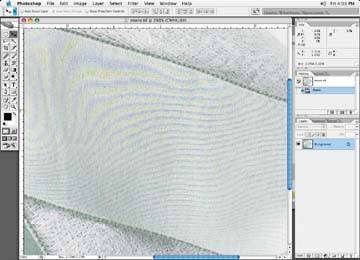
Speaking of fabric, a common problem that arises when printing images with patterns, fabric, or something with texture is an effect called a moiré pattern. This occurs when the screen angles used for printing interact with the pattern of the material. The effect looks like an oil slick, a wavy line pattern, or some other unintended pattern. Take a look at Figure 3-36 and note the moiré pattern that has developed.
Figure 3-34. Fabric brushed with a brush that's too soft causes a halo effect around the brush perimeter
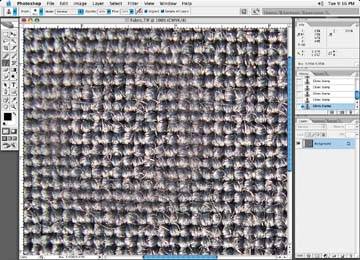
Figure 3-35. Use a hard-edged brush to avoid the halo effect
If we are talking about an image that is to be printed and is a CMYK image, then each of the color channels, the CMYK, will be on different angles in relation to one another. Imagine a window screen. If you had four of them representing each color channel, you wouldn't simply lay one on top of the other in the exact same rotation so that they lined up perfectly. As you lay each screen down on top of another, you twist one to the left a little and one to the right a little so that they created a diffused pattern. This is how each color channel is printed.
There are a couple of things you can do to try and get rid of the moiré effect.
Figure 3-36. What the image looks like with a moiré pattern (note the wavy pattern in the image)
If you have any control of the screen angles used in the print process, you can try and change the individual color angles. This technique is a little unpredictable, as this may cause the pattern to show up somewhere else in the image. All you can do is experiment.
Occasionally, you may get hot spots on flesh tones around noses, eyes, and ears. You can use the Selective color correction tool, select the RED and/or the Magenta color chip, and reduce the red with the slider control and increase the yellow and cyan sliders until the color falls in line with the rest of the image in color.
You can also try rotating the image slightly, which may get rid of the pattern. Or it may cause it to pop up in another portion of the image!
Another option is to throw the problem area out of focus with a Gaussian blur, enough to get rid of the pattern, and then add a small amount of noise to bring back some of the texture. This is a good option, particularly if it is a small image and the pattern causing the moiré isn't the focal point of the image. You could Clone brush the area at a very low opacity setting and try to massage the pattern out. Increasing the resolution occasionally works, especially if you can do this at the point of scanning. Instead of scanning the image in at 300 dpi (150 dpi line screen), scan it in at 600 dpi. This may help. Unfortunately, there are no hard and fast rules for fixing a moiré there is a lot of experimentation involved, and you'll just have to try a few things and hope for the best.