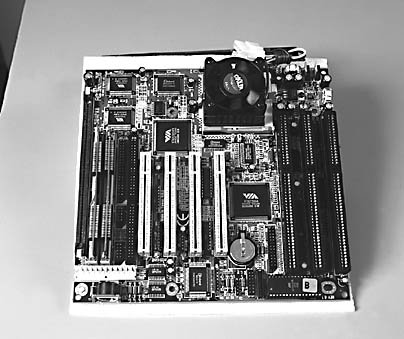
Figure 14.10 Motherboard
Before deciding to undertake this major overhaul, there are several questions to answer:
- Will the motherboard fit into the existing case? Check the size and alignment of mounting holes (plastic standoffs that keep the circuitry from contacting the case).
- Does the motherboard have the same built-in COM and LPT ports?
- Does the motherboard have a built-in video card?
- Will the existing expansion cards fit the motherboard's expansion bus slots? Are there enough slots available to accommodate the existing cards? The expansion slots should go toward the back of the computer, where the openings are located.
- Is the power connector located on the same side as the power supply? It should be as near to the power supply as possible.
- Will the existing drives (CD-ROM, IDE, or SCSI) work with the controllers on the motherboard?
- Will the SIMMs on the old motherboard work with the new motherboard?
- Will the upgrade meet your current and future requirements?
Installing a new motherboard is a major task and requires complete disassembly, reassembly, and setup of the computer and all its devices. You will put everything covered so far in this lesson into practice when you replace a motherboard. The best advice is to prepare everything ahead of time and to take good notes while disassembling the old motherboard.
Replacing a Motherboard
Replacing a motherboard is probably the most difficult task (from the perspective of physically replacing parts) that a computer technician will take on. It amounts to no less than building a computer, because it will, in many cases, require complete disassembly first. Although complex, if you carry out the following procedure one step at a time, you should not face any problems.
- Complete an installation checklist and make sure all the necessary parts are available and will fit into the computer.
- Follow the "disassemble a computer" steps set out in Lesson 1; these include removing all the screws and standoffs (taking care to keep them in a safe place) and the old motherboard.
- Check all the settings on the new motherboard.
- Install the new motherboard. Position the standoffs and make sure they align with the case and the motherboard. Verify that the motherboard is positioned correctly (expansion slots facing the back of the computer). Carefully tighten the screws. Visually check to be sure that the motherboard does not touch the case. (See Figure 14.11.)
-
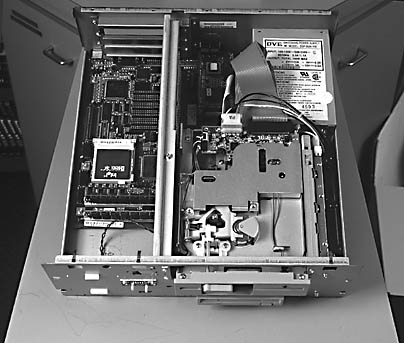
Figure 14.11 Motherboard in case
- Reconnect the case switches. Use the notes taken during disassembly to verify they are in the right place.
- Follow the steps for computer reassembly set out in Lesson 1.
- Test to be sure that the computer boots up.
- Complete the final testing and close the case.