|
1.
|
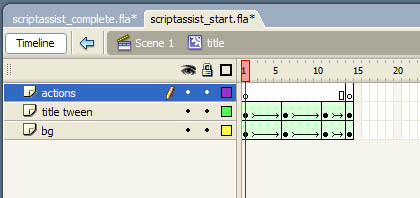
From the Library panel, select the Title movie clip and its timeline is displayed.
Selecting the Title movie clip timeline to add a script to the last frame
|
|
2.
|
With the Actions layer selected, select the last frame (14) on the Timeline.
|
|
3.
|
In the Actions panel, click Script Assist to display Script Assist mode.
|
|
4.
|
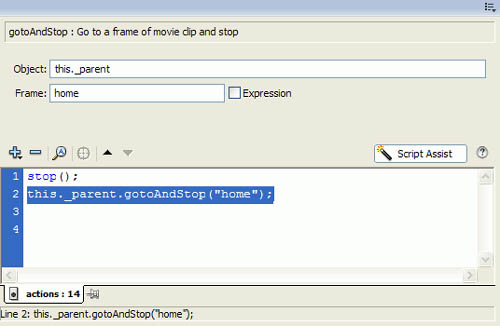
Using either the Actions toolbox or the Add button on the Actions panel toolbar, select Global Functions > Timeline Control and insert the stop() function.
|
|
5.
|
Next, using either the Actions toolbox or the Add button, select ActionScript 2.0 Classes > Movie > MovieClip > Methods > gotoAndStop.
Modifying function parameters to complete the script
|
|
6.
|
In the Script Assist panel, select the gotoAndStop action on line 2.
|
|
7.
|
Click in the Object text box.
|
|
8.
|
Click the Insert Target Path button.
|
|
9.
|
In the Insert Target Path dialog box, click the _root object and click OK.
|
|
10.
|
In the Frame text box, enter home.
|
|
11.
|
Deselect the Expression checkbox.
Now, when the Title movie clip reaches the last frame and the animation is complete, "Home" is displayed. This is the initial state of the application, after it loads and before the user clicks any of the buttons. |
|
12.
|
Save your work.
|
All of the scripts needed to run the sample application are now complete and the application is ready to be tested.
by updated
