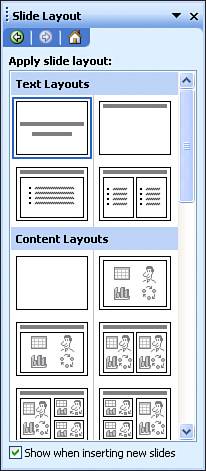
Figure 4. Use the Slide Layout pane to specify which placeholders will go on a slide and where they will sit.

When you begin with a blank presentation, PowerPoint starts with a single title slide. Although it's a tedious way to work, you can build your presentation from this view, one slide at a time. Aim your mouse pointer at the layout that matches the kind of slide you want to add, click the arrow to the right of the slide layout icon, and choose Insert New Slide from the menu.
In a blank PowerPoint presentation, each new slide you create is completely free of any design elements whatsoever. You get a white background, with text formatted in the Arial font (44-point for slide titles and 32-point for body text) and generic round bullets.
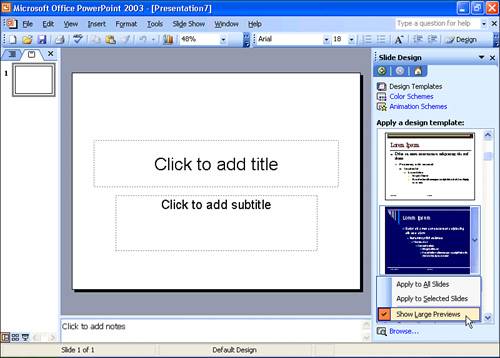
It is hard to imagine a layout more dull than this default design. To replace it with one that contains coordinated colors, fonts, and graphics, click the Design icon on the Formatting toolbar (or choose Slide Design from the drop-down list at the top of the task pane). The Slide Design pane (see Figure 5) appears.
Figure 5. Switch to this larger preview to get a better picture of what each design template looks like.

 |
Initially, PowerPoint installs only a limited selection of its design templates. To make the entire collection of templates available, scroll all the way to the bottom of the Slide Design pane and click Additional Design Templates. (If you kept the installation files on your hard drive, you won't need the Office CD.) If that's not enough, a quick search of the Internet will turn up literally thousands of downloadable templates of varying sophistication. You can also create your own templates, either from scratch or by modifying a template you found elsewhere. Don't be afraid to experiment! |
When you click the icon for a design template, PowerPoint immediately applies the design to all slides in your presentation. The icons offer a thumbnail-sized preview of the design, but there's no substitute for experimentation. Feel free to apply different designs to the current presentation and then flip through the slides to see what each design looks like; if your presentation includes important content, create a copy first so that you don't have to worry about inadvertently messing up the existing design.
If you regularly prepare presentations for an organization or company that has certain standards for all presentationslogo in a specific location, identification of title slides, and so onyou might want to customize PowerPoint's "blank" presentation so that it reflects those standards. That way, whenever you begin a new presentation you'll have the basic requirements out of the way before you type your first bullet point.
To replace the PowerPoint default blank presentation with one of your own design, follow these steps:
|
1.
|
Create the presentation you want to use as the "blank" presentation. Add slides, customize slide masters, and change designs until you're satisfied that the basic arrangement is a good starting point for any new presentations you create.
|
|
2.
|
Choose File, Save As. In the Save as Type box, choose Design Template.
|
|
3.
|
Type
Blank in the File Name box and click Save. |
 |
By default, PowerPoint saves your new blank presentation in your personal Templates folder (to view the contents of this folder, click Start, Run, enter |
With a Blank Presentation file in the correct location, all "blank" presentations whether created via the New Presentation task pane or using the New icon on the Standard toolbarwill be based on that file.