The Problem:
Word suddenly inserted a decorative line as I was typing in a document. I've tried dragging across it, but I can't select itso I can't get rid of it.
The Solution:
This is the AutoFormat As You Type feature being helpful again by automatically applying a border when you type a string of text that matches one of its entries.
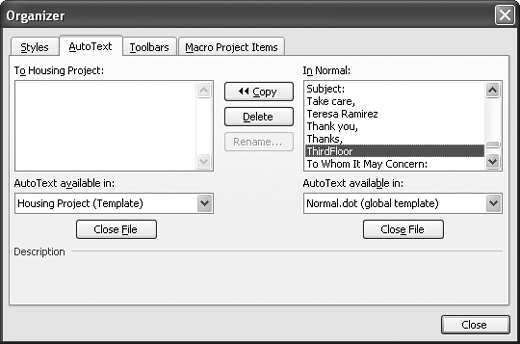
Figure 3-5. Use the AutoText tab of the Organizer dialog box to copy AutoText items from Normal.dot to another template.

If you haven't done anything since Word inserted the line, press Ctrl+Z to undo the line.
If Word 2003 or XP is displaying a Smart Tag button, click it and choose Undo Border Line to get rid of the line (see Figure 3-6). Click the button again and choose Stop Automatically Creating Border Lines to suppress this behavior in the future.
Figure 3-6. The AutoFormat As You Type feature can automatically insert lines that you can't select manually to delete.

If Word isn't displaying a Smart Tag button, delete the line by selecting the paragraph marker before it and pressing Delete. Alternatively, select the paragraph containing the line and press Ctrl+Q to reset its formatting to the style's default formatting. You can also choose Format » Borders and Shading, click the None button, and then click the OK button, but the other methods tend to be faster.
To prevent Word from applying these borders, choose Tools » AutoCorrect Options (or Tools » AutoCorrect in Word 2000), click the AutoFormat As You Type tab, and uncheck the "Border lines" box ("Borders" in Word 2000) in the "Apply as you type" area. Click the OK button.
Here's how to use this feature to decorate your documents quickly.
-
Start a new paragraph.
-
Type three or more hyphens (for a thin line), underscores (for a thick line), asterisks (for a dotted line), tildes (for a zigzag line), equals signs (for a double line), or hash marks (for two thin lines with a thick line between them).
-
Press Enter.