Figure: Multilevel list example:

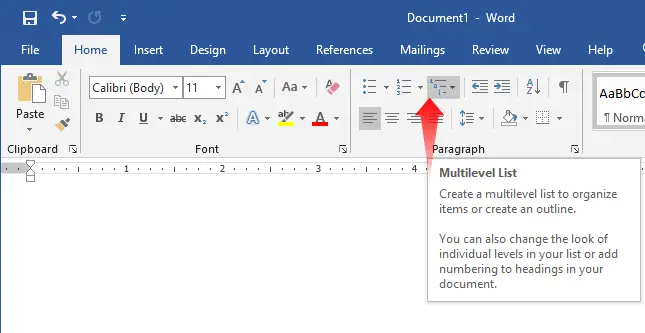
First, open a Word document and click Multilevel List button in the Paragraph group from the Home tab, as shown in the figure:
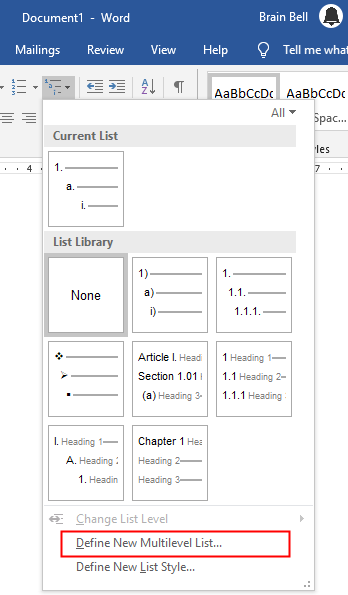
Click Define New Multilevel List... from the menu:
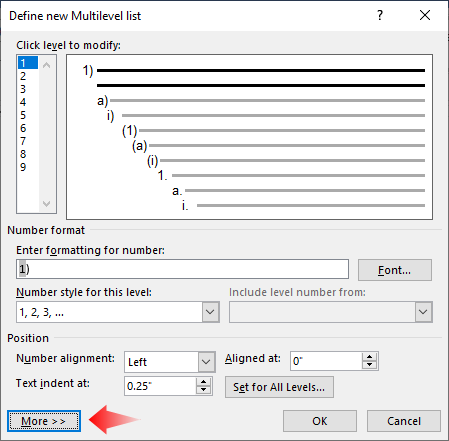
The More>> button shows the more options that help you to customize the levels:
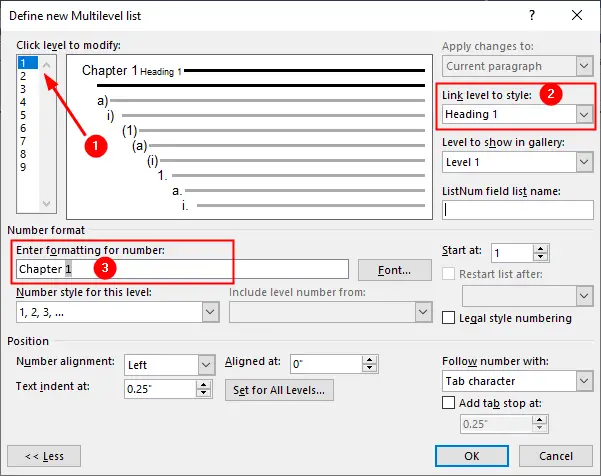
Click level 1 to modify it, select Heading 1 from the Link level to style drop-down menu to link it to Level 1, in the Number format modify the number formatting and write Chapter before the number 1. This method helps you to automatically write Chapter whenever the heading linked to level-1 is inserted:
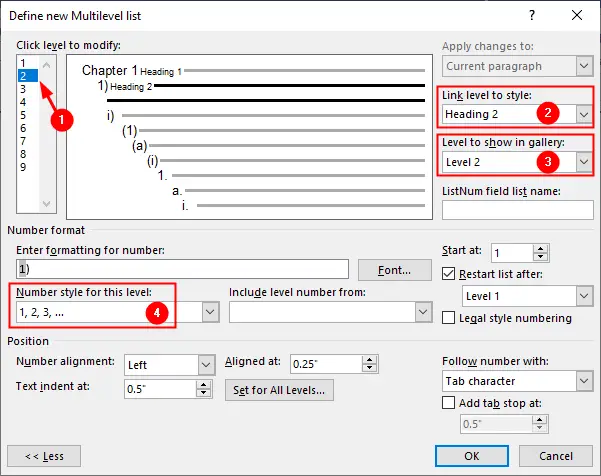
Next, link the level 2 to Heading 2 and change the number style for this level to 1,2,3,...:
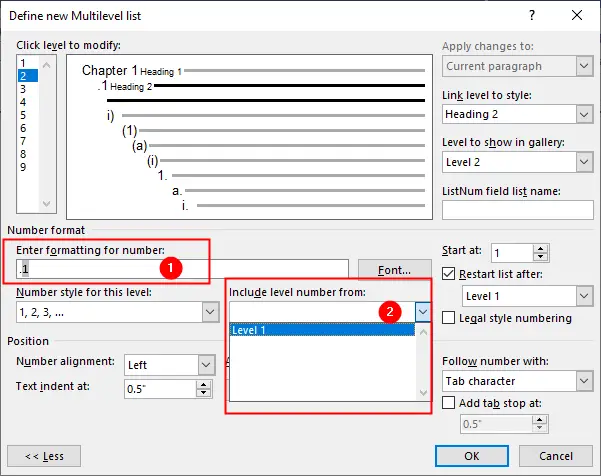
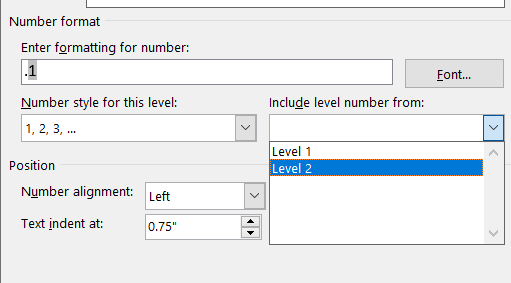
We want second heading to be shown as 1.1, 1.2, 1.3, and so on. The number before dot . indicates the Level 1 and the number after the dot . indicates the Level 2. Insert a dot . before the number and include the level 1 from the Include level number from drop-down menu:
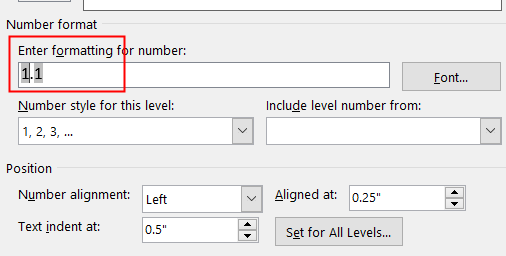
The numbering of the previous level must be inserted before the dot .. See following figure, the Number Format should look like this:
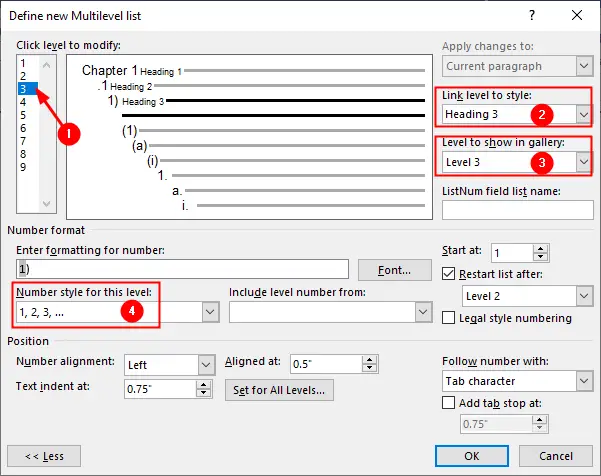
Next, select level 3, link it to Heading 3, change the level to show in the gallery to level 3, and change the number style for this level to 1,2,3 …, as shown in the figure:
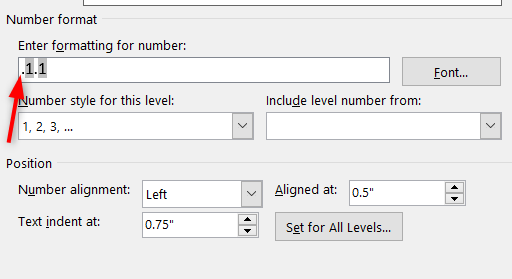
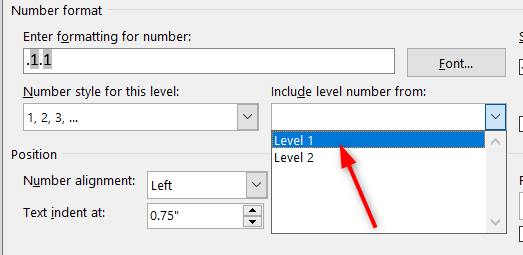
We want the third level to show headings in the form: 1.1.1, 1.1.2, 1.1.3, and so on. Insert a dot . before the number, and include level from Level 2, while the text cursor is on the left side of the dot ., as shown below:
We repeat the same steps, insert a dot . before the number as shown in the figure:
And this time, we include the level number from Level 1:
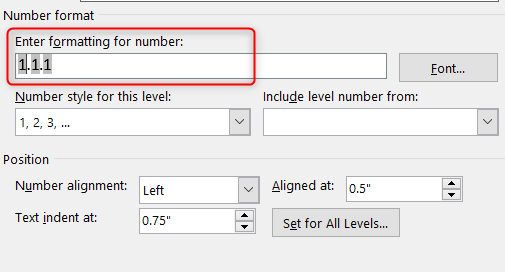
The numbering format should look like this:
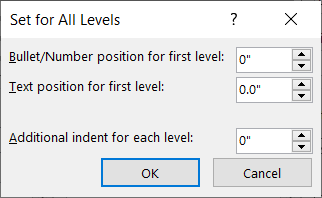
For this tutorial, we do not want text indent and alignment space to the headings or to the text. Set 0" to Aligned at and Text indent at and click Set for All Levels:

Set 0 for all fields as as shown in the figure and click OK:
In Home tab’s Styles group, you can see the modified headings styles:

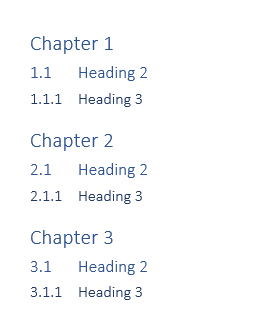
Now write some text and assign headings to see the result of our customized multilevel list. The results would be similar to the figure below:
Saving Styles
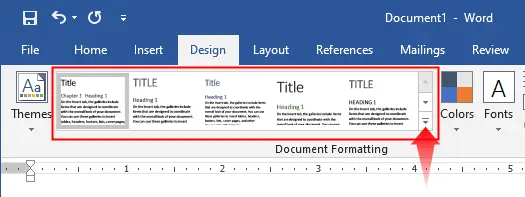
You can save this style by going to Design tab, click on the arrow as shown in the image:
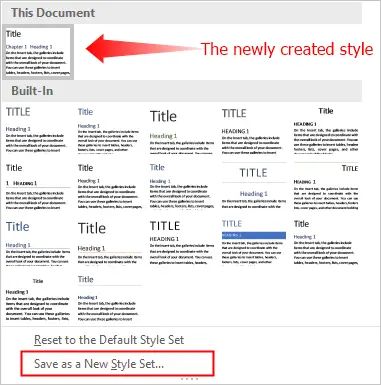
Select the newly created style and click Save as New Style Set:
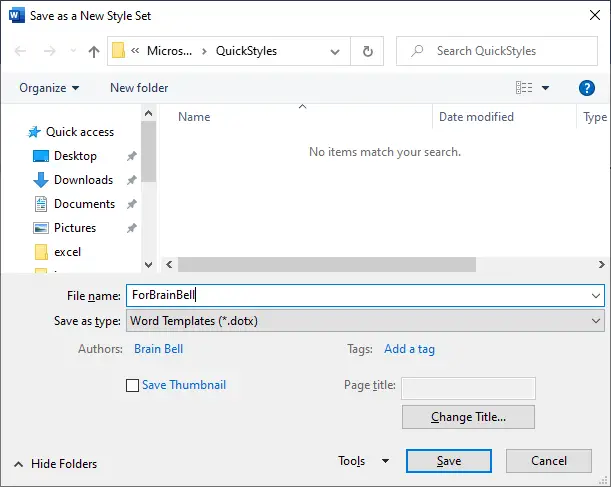
Write the style name in the Save as a New Style Set dialog box to save the style in any location of your System:
Your saved style will be shown along with the other Style Sets:
