If you're not familiar with Photoshop then read this tutorial New file for the Web before working on this tutorial.
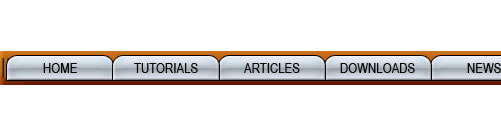
Navigation is the most important graphic element in a Web site. A good navigation scheme is one that is both easy to find on every page and easy to use. It communicates clearly and simply where the viewer is in the site, where she can go from that point, and how to get there.
Add a set of matching buttons to a navigation bar.

This navigation bar image was made in Photoshop to take advantage of Photoshop's wide range of image-editing features. You could continue to use Photoshop to add buttons to this bar, but we recommend you switch to ImageReady for that purpose to make use of ImageReady's exclusive object-oriented tools (the Tab Rectangle tool, Smart Guides, multiple layer selection, layer groups, Move tool variations, and more).

2. Create a Button Shape
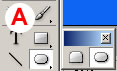
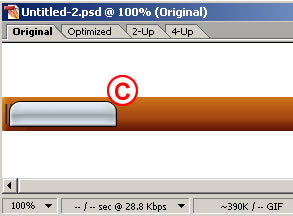
Start by creating one tab-shaped button. Select the Tab Rectangle tool in the ImageReady toolbox A. In the Options bar, make sure the Shape Layer icon is selected B. Set the button's size by checking Fixed Size and entering Width: 106 px and Height: 24 px C. Set the button's style by clicking the arrow on the Style field and choose Glass Table Cool style or just choose a different style. Select the Background layer in the Layers palette. Then click in the image to create a button on a new shape layer E. Give the layer a meaningful name by double-clicking Layer 1 and typing button 1 in its place F.


You can hide the blue border that appears around your new button by choosing View>Show>Layer Edges.
3. Move the Button
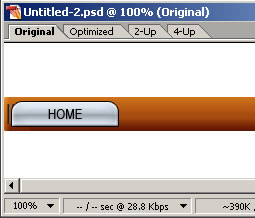
Now you'll turn the button upside down and hang it from the navigation bar. Select the Move Tool in the toolbox A, and make sure the Layer Select tool is highlighted in the Options bar B. This variation of the Move tool automatically selects the layer or layer group that contains the object you click on in the image. Click on the button you just made to automatically select the button 1 layer. Choose Edit>Transform>Flip Vertical to invert the button. Click and drag the button into position under the navigation bar's overhang C.

4. Add Button Text
Select the Type tool in the ImageReady toolbox. In the Options bar, set Font Family to Arial Narrow or a similar font A, set Font Size to around 14 px B, and set Font Color to black C. Click on the button in the image and type home. This creates a new home type layer above the button 1 layer. Don't worry about where the text is positioned on the button for now.


5. Make a Layer Group
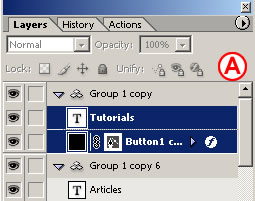
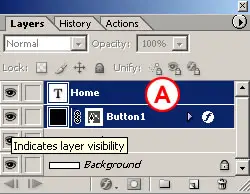
With the home type layer selected, hold the Shift key and click the button 1 layer in the Layers palette, so that both layers are selected A. Then choose Layer>Group Layers from the main menu bar. This gathers the two layers into a layer group labeled Group 1 B. Now that the button and text are grouped, it will be easy to duplicate them as a unit.
6. Make Duplicate Buttons
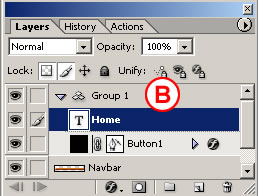
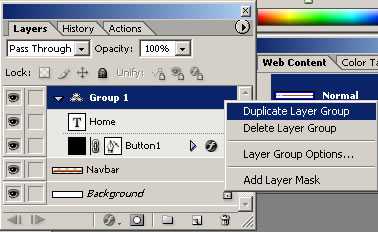
Duplicate button 1 along with its text by Control/right-clicking Group 1 in the Layers palette and choosing Duplicate Layer Group from the menu that appears in following image. You won't see the duplicate button in the image yet because it is located directly on top of the original button.
You can select more than one layer at a time-but only in ImageReady, not Photoshop. To select multiple layers, Shift-click if the layers are next to one another in the Layers palette; Command/Ctrl-click if they are not.
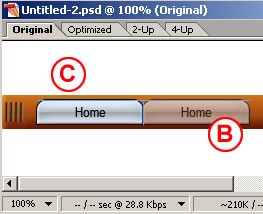
Select the Move tool, and make sure its Layer Select tool variation is highlighted in the Options bar. Click on the button in the image and drag to the right to move the duplicate button and its text B.
Notice the light blue lines that appear and disappear as you move the button C. These are Smart Guides-temporary alignment guides that display automatically when you move an object. Use them to align the buttons horizontally as you drag. Release the mouse when a vertical Smart Guide appears in between the two buttons, indicating that they are no longer overlapping.
Layer Groups vs. Layer Sets.
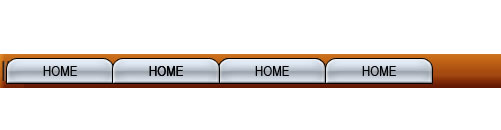
ImageReady layer groups are similar to layer sets, but more useful for working with objects, because of the way layer groups react to the Move tool variations-the Layer Select tool and the Direct Select tool. If an object is on a layer that's included in a layer group, clicking on the object with the Layer Select tool selects the entire layer group, while clicking with the Direct Select tool selects only the layer. If an object is on a layer that's in a layer set, both tools select the layer, but not its set.Repeat this step five more times until you have a total of seven layer groups and seven buttons, all displaying the label home D.
7. Change the Button Text
Select the Type tool and click and drag to highlight the word home on the second button from the left. Type the word Info instead. Repeat this step on each button, renaming the next five buttons: tours, stories, pictures, booking, and links.

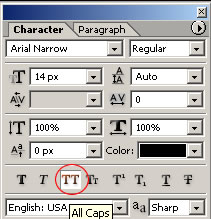
8. Edit Multiple Layers at Once
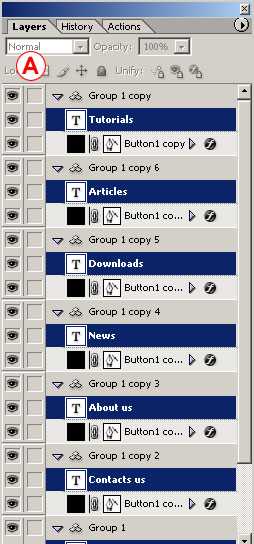
You can save time by editing multiple layers together. Command/Ctrl-click on each of the seven type layers in the Layers palette to select them all A. Open the Character palette (Window>Character). With the Type tool selected, click the All Caps icon in the Character palette to make all the button labels uppercase.
9. Align Text to Buttons
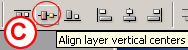
Now align each text label to its button. Start with the home button. Shift-click the home type layer and the button 1 layer to select them both in the Layers palette A. Select the Move tool in the Options bar. Click the Align Layer Horizontal Centers button to move the text to the horizontal center of the button B. Then click the Align Layer Vertical Centers button to move the text to the vertical center of the button C. Repeat this step on each of the six remaining pairs of button and text.