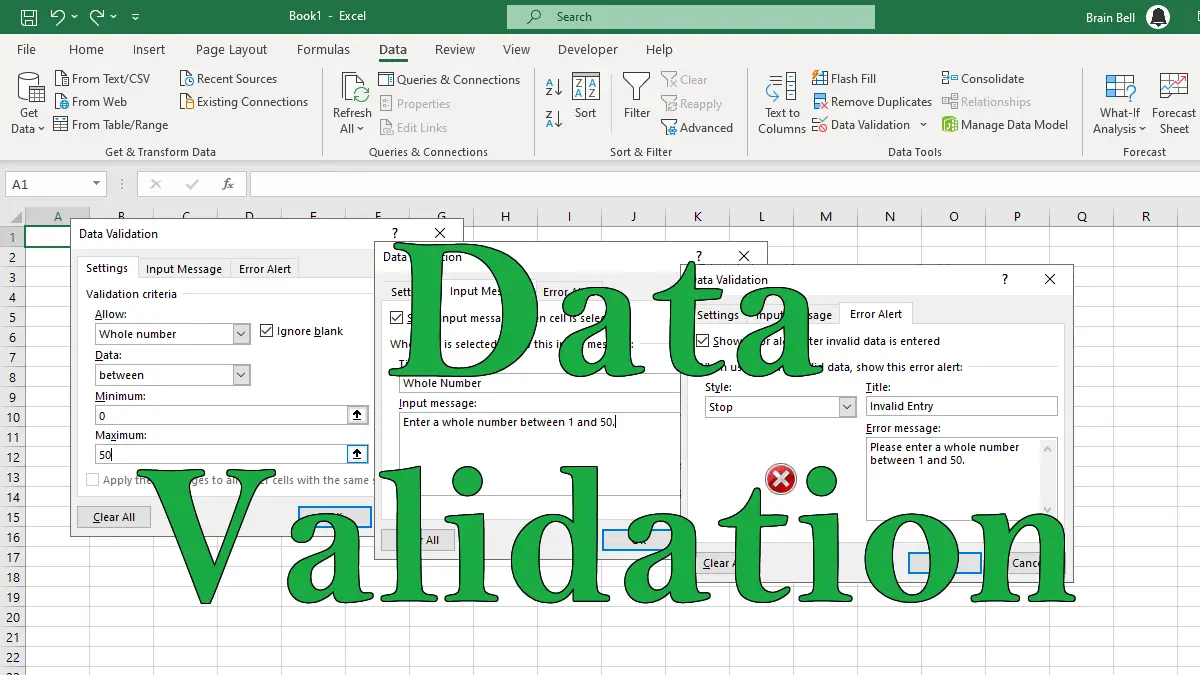
- Specifying Data Validation Criteria
- Validating Existing Data
Using Circle Invalid Data and Clear Validation Circle - Modifying Validation Rules
- Clearing Data Validation Rules
The data validation feature lets you create rules for what can be entered into a cell. For example, you may want to restrict data entry in a certain cell to whole numbers between 0 and 50. If the user enters an invalid value, you can show a custom error message.
Example: Displaying an error message when the user makes an invalid entry:
Specifying Validation Criteria
Here are the basic steps to use data validation in Excel:
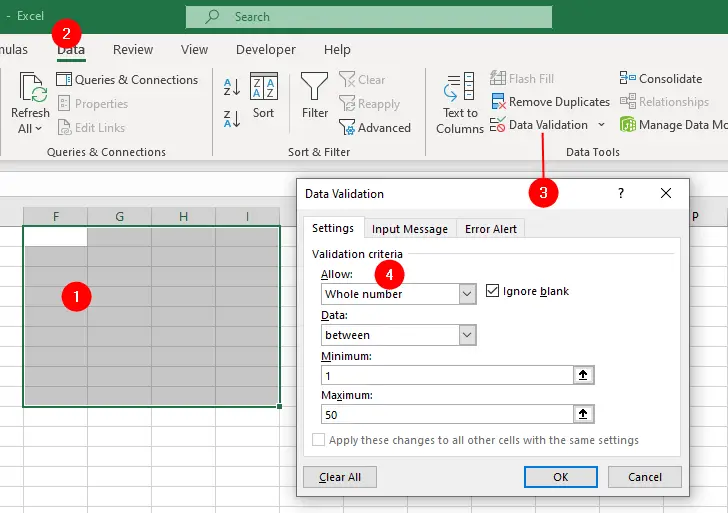
- Select the cell or range of cells you want to apply data validation to.
- Click on the
Datatab on the ribbon and then click onData Validationin theData Toolsgroup. - The Data Validation dialog box appears.
- On the Settings tab, click
Allowdrop-down and choose the type of validation criteria you want. For example, if you want to limit data entry to whole numbers between 1 and 50:- Select
Whole numberfrom the list - Then select
betweenfrom theDatadrop-down list. - Enter
1in the Minimum box and - Enter
50in the Maximum box.
- Select
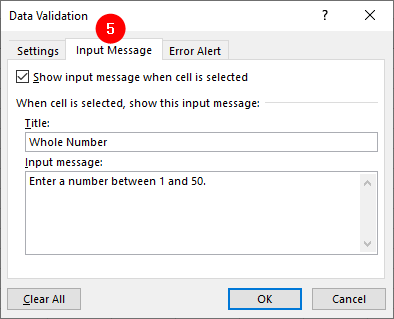
- On the Input Message tab, you can create a message that will appear when users select the validated cells. This message can help users understand what kind of data they need to enter. For example:
- In the
Titlebox, write “Whole Numbers”. - In the
Input messagebox, write “Enter a whole number between 1 and 50”.
- In the
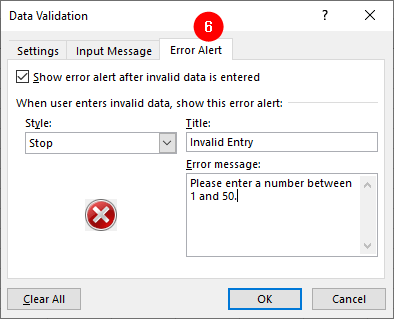
- On the Error Alert tab, you can customize the error message that will appear when users enter invalid data. You can also choose the style of the error alert from Stop, Warning, or Information. For example, if you want to prevent users from entering invalid data:
- Select
Stopfrom the Style drop-down list - In the
Titlebox enter “Invalid entry”. - In the
Error messagebox enter “Please enter a number between 1 and 50”.
- Select
Click OK to close the Data Validation dialog box to apply the validation rule to the selected cells.
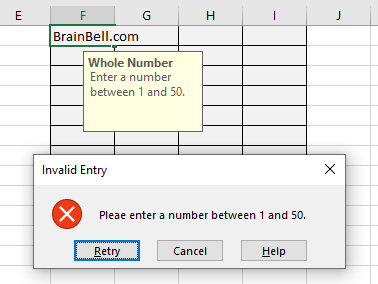
Now, whenever you select the validated cells, you’ll see the input message you created. And if you try to enter data that does not meet the validation criteria, you will see the error alert you customized. See the following figure:
Validating Existing Data
When you create validation criteria, it validates only new entries or the entries you edit manually. However, sometimes you may paste data from other sources that do not match the validation criteria. To find these cells, you can use the Circle Invalid Data command. This command will draw a red circle around any cell that contains invalid data. To use this command, follow these steps:
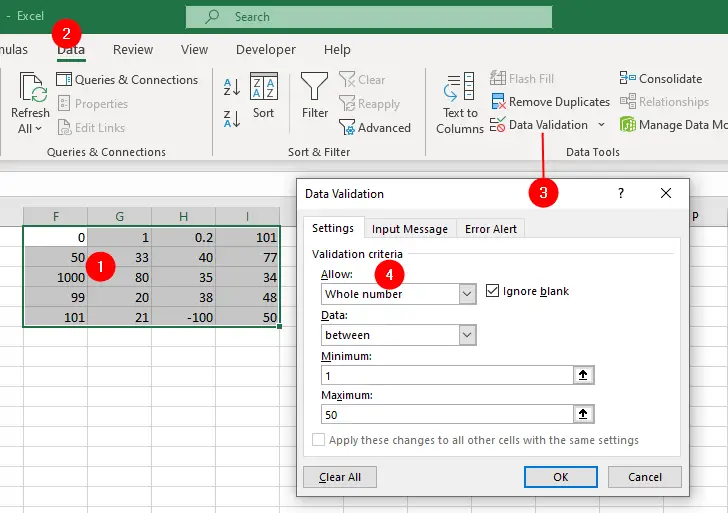
- Select the data you want to apply data validation to.
- Click on the
Datatab on the ribbon and then click onData Validationin theData Toolsgroup. - The Data Validation dialog box appears. Specify the data validation criteria as shown in the figure.
After specifying the validation criteria, click the down arrow at the right of the Data Validation button and choose the Circle Invalid Data option. Excel will circle any cell that has invalid data, see the following figure:
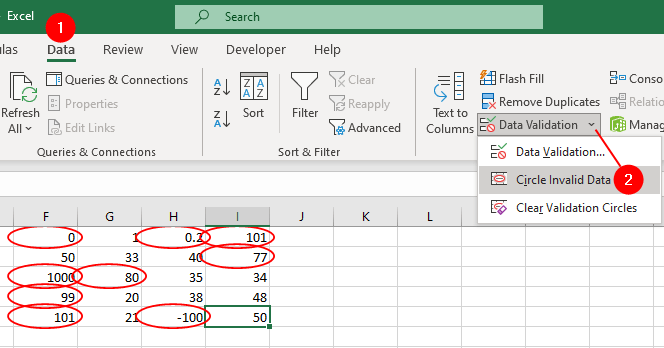
To remove the circles, click on Clear Validation Circles in the Data Validation drop-down.
Validation Criteria
You can specify a variety of data validation criteria in the Settings tab of the Data Validation dialog box. The following options are available from the Allow drop-down menu:

- Any Value: Selecting this option removes any existing data validation.
- Whole Number: The user must enter a whole number.
- Decimal: The user must enter a number. For example, you can specify that the entry must be between
0.1and1.9. - List: The user must choose from a list of entries that you provided in the form of comma-separated values in the
Sourcebox or by providing a cell range. - Date: The user must enter a valid date. Specify a valid date range from the choices in the
Datadrop-down list. For example, you can specify that the data entered must be greater than or equal to June 1, 2023. - Time: The user must enter a time. Specify a valid time range from choices in the
Datadrop-down list. For example, you can specify that the data entered must be greater than 08:00 AM. - Text Length: The length of the text in the cell. Specify a valid length by using the
Datadrop-down list. For example, you can specify that the text length must be between 10 to 15 characters. - Custom: Make your own validation criteria that return FALSE if the validation failed, otherwise return TRUE.
The Settings tab of the Data Validation dialog box also contains some checkboxes:
- Ignore blanks:
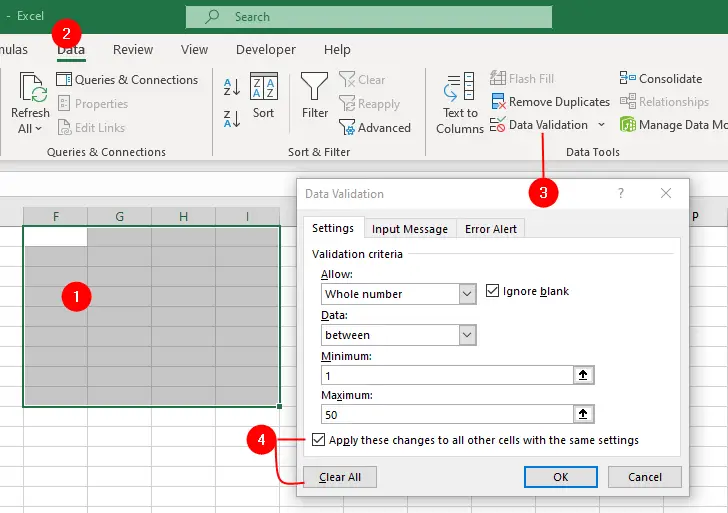
If checked, the blank cells will not be validated against the validation criteria. - Apply these changes to all other cells with the same settings:
This box is available when you modify a rule, check this box if you want to apply changes to other cells specified the same rule.
Clearing Data Validation
- Select the cell or range of cells you want to clear data validation to.
- Click on the
Datatab on the ribbon and then click onData Validationin theData Toolsgroup. - The Data Validation dialog box appears.
- On the Settings tab:
- Check
Apply these changes to all other cells with the same settingbox if you want to remove data validation on all cells having the same rule.
- Click
Clear Allbutton
- Check
- Click
OK.
Modifying Data Validation Criteria
- Select the cell or range of cells you want to modify data validation to.
- Click on the
Datatab on the ribbon and then click onData Validationin theData Toolsgroup. - The Data Validation dialog box appears.
- On the Settings tab:
- Check
Apply these changes to all other cells with the same settingbox if you want to apply modifications to all cells having the same rule. - Make the necessary changes.
- Check
- Click
OK.